Shot Down DUI Charges With An Efficient DUI Lawyer

What are the Benefits of a Wet Reckless?

Generally, reckless driving carries less severe penalties than a DUI charge. So, a wet reckless plea deal typically means lower fines and less potential jail time than would result from being convicted of a DUI.

A wet reckless plea can also have advantages with regard to license-related consequences. Many states allow judges to suspend a motorist’s license for reckless driving. But for DUI convictions, license suspension is typically mandatory for six months to a year. And a DUI conviction will generally add more traffic violation demerit points to person’s driving record than will a reckless driving violation.

Wet reckless convictions and DUI convictions carry different penalties, but a wet reckless conviction can count as a prior DUI. In some states, someone who has a wet reckless conviction and then is convicted of DUI will be sentenced as a repeat DUI offender.

HOW TO REDUCE DUI CHARGES WITH A PLEA BARGAIN

A plea bargain is considered before the Crown attorney presents your case during a hearing. Depending on the circumstances surrounding the case, your lawyer may approach the Crown attorney for a plea deal. The Crown attorney will agree to a plea bargain if they feel that their case is seriously flawed and it is not possible for them to proceed with the case in court. Instead of getting the case dismissed they can charge you with a lesser charge. An experienced DUI lawyer should be able to find ways on how to reduce DUI charges via a plea bargain so that it is not necessary for you to submit to the maximum penalties for your charges.

When Do You Plead Guilty or No Contest?

The first court date in a DUI case is normally the “arraignment.” At the arraignment, the judge normally asks whether the defendant plans to hire an attorney or wants a court-appointed lawyer. Defendants who have their attorney situation resolved on that first day will typically enter a plea to the charges. Otherwise, the judge might set a new court date for the defendant to come back with an attorney and enter a plea to the charges. In either scenario, the defendant’s initial plea is normally “not guilty.”

For defendants, there’s usually no benefit to pleading guilty at the first court appearance. Generally, plea deals a prosecutor offers on the first day are the same or worse than offers that come later. So, it’s typically best to initially plead not guilty and get a new court date a few weeks out or so.

This additional time will give your attorney the chance to review the prosecution’s evidence and come up with a legal strategy. Even if you ultimately decide to make a plea deal, this investment of time by your attorney often pays off anyway. With a good understanding of the facts of your case and some legal research, you attorney might be able to get you a better deal by pointing out problems with the prosecution’s case and possible defenses to the charges. Prosecutors who have doubts about their ability to prove a DUI at trial are more apt to offer plea bargains favorable to the defendant.

So, in many DUI cases, the defendant ends up entering a guilty or no contest plea at the second or third court date. However, it’s possible for a defendant to enter one of these pleas at any point prior to the jury’s verdict.

Reducing Stress by Becoming Involved in Your Defense:

Another source of stress can be the feeling of a loss of control. Many people arrested for DUI are in management or professional careers, and therefore, and are therefore accustomed to being in a position of control. Consequently, this loss of control can be a very new experience for you. This feeling usually begins when your vehicle was stopped or when you first came into contact with the police, and the officer began ordering you to take certain actions. You may have been wondering whether or not you had to do what the officer was ordering, and this is something you should discuss with your attorney.

The best way to overcome this feeling of being out-of-control is to ask your attorney how you can help with your defense. This may be as simple as becoming involved in therapy and/or treatment, but might also includes obtaining medical records and driving records. Your attorney might also ask you to travel to the “scene” and take digital photographs that can later be incorporated into a power point presentation at trial.

One thing to keep in mind however, is that your attorney is working hard to obtain the best possible result. This can also be difficult, because you may not be accustomed to letting another person control something so important to you, and the only way to reach this level of trust is by carefully selecting your attorney.

If and when you and your attorney decide to pursue an actual trial, you might be able to take a more active role in trial preparation. To assist your attorney in preparing for trial, it is essential that you provide the appropriate contact information, so that you can be reached at a moment’s notice. It may also be important for you to be in contact with your witnesses as well as any expert witnesses. Sometimes, we will ask you to meet with the expert witnesses to help gather information.

You should, of course, always know what direction your case is going. For example, if motions are being scheduled or if trial is being scheduled, it is important for you to discuss these things with your attorney. Again, understanding what to expect will go a long way toward relieving your stress. However, don’t try to be involved in every decision that is made, as this is often counterproductive. Finally, you must have faith and confidence in your lawyer and just let him or her do what you have paid them to do. They are the legal experts and are working hard to obtain the best possible result for you.

Ways to Beat a DUI

No Probable Cause for the Stop

The officer must have probable cause to stop, detain, or arrest you for DUI. If there was no probable cause the evidence, and the case may get dismissed.

The police must have a reasonable suspicion or reasonable belief that you are engaged in a criminal activity before they can stop your car, conduct a DUI investigation, or arrest you for a DUI in San Diego. This reasonable belief is a standard known as probable cause. If an officer does not have the required probable cause before engaging in any one of these stages, any evidence that is obtained as a result of that illegal procedure will be suppressed. When evidence is suppressed, it means that the prosecution cannot use it against you. This means that evidence obtained without probable cause usually results in reduced or dismissed San Diego DUI charges.

For example, if you were driving at 2:05 a.m. and committed no traffic violation but were pulled over for simply being on the road after “bar time” any evidence obtained after the stop could not be used against you. This includes anything you say to the officer, the blood/ breath results, and any field sobriety tests.

Faulty and Unreliable Breath Tests

The DUI breath tests used in San Diego have many flaws. These tests are subject to some of the following problems:

A. Improper use by the police
B. Physiological Conditions (gastroesophageal reflux disease aka GERD)
C. Instrument Malfunction
D. Failure to observe the defendant prior to the test.

DUI breath testing is the most common way to measure a defendant’s BAC but it is not always an accurate because of the fact that a DUI breath test doesn’t directly measure the amount of alcohol in your blood. It measures the amount of alcohol present in your breath and converts that amount to determine the amount of alcohol in your blood. As a result, DUI breath testing is susceptible to a variety of outside influences that can generate an erroneously high BAC reading.

Mouth Alcohol

DUI breath testing instruments are designed to capture a sample of breath from your deep lung tissue; this is known as “alveolar air.” Residual alcohol can linger in the mouth for some of the following reasons:

A. Dental work trapped small amounts of alcohol-soaked food in your teeth,
B. You burped or regurgitated, or
C. You suffer from acid reflux, heartburn, or GERD.

The breath test instrument captures “mouth alcohol” rather than simply “aveolar air.” As a result, mouth alcohol can trigger a false BAC reading on a San Diego DUI breath test.

Medical Conditions

Medical conditions such as Gastroesophageal Reflux Disease (more commonly referred to as “GERD”), acid reflux, or heartburn can contaminate DUI breath test results. GERD, acid reflux, and heartburn are all medical conditions that create possible mouth alcohol situations. This is because these conditions produce a flow of acid that travels from the stomach into the mouth. When this occurs during a DUI breath test or just prior, the alcohol that travels from your stomach to your mouth disguises the deep lung air that the breath testing instrument is intended to measure. As a result, GERD, acid reflux, and/or heartburn can cause a falsely high BAC on a California DUI breath test.

Police Misconduct

Even if you were driving under the influence, police misconduct may knock out your DUI charges.

If you can demonstrate police misconduct, then your DUI charges may have to be dismissed. This is true even if you were actually guilty of DUI. This is because proper police procedures must be followed. For example,

A. DUI police reports must be accurate,
B. Title 17 procedures must be complied with, and
C. Courtroom testimony must be truthful.

If these, or other, conditions are purposely manipulated or ignored, evidence that was illegally obtained or fabricated will be thrown out. Depending on how severely this impacts the prosecutor’s case, he may choose to reduce or dismiss your charges.

Marble Tile Flooring For Small Homes

What do I need to install floor tile?

Selected Tile Material

You have seemingly endless choices when it comes to tile, including different materials, colors, patterns, shapes and sizes. The style of your room and the look you’re going for with the renovation helps you decide which tile to choose.

Not only do tiles come in various colors and designs, they also have different hardness ratings. Ceramic tiles receive a rating based on a hardness scale and divides them into groups. Group 0 tiles are not suitable for floor use, while Group 1 tiles will withstand light foot traffic. Group 5 tiles hold up even in areas of heavy foot traffic. Choose a tile that can handle the amount of foot traffic the area receives.

Adhesive Material

Adhesive is required to keep the tiles secured to the floor. Thin-set adhesive, also called Portland cement mortar, is a combination of cement, sand and methylcellulose. Thin-set adhesive is available as dry-set or latex-modified. Because of its water-repellent properties, latex-modified adhesive is ideal in areas with water exposure, such as bathroom floors. Although there are a few thin-set adhesive products at the ready, most require the addition of water prior to use. Mastic, or organic adhesive, is a pre-mixed tile adhesive. Type 1 mastic is suitable for floor tile installations, whereas Type 2 is not.

Sanded or Unsanded Grout

Your tile work isn’t done after sticking the pieces to the floor. You’ll also need grout to fill in the gaps between the tiles. Cement grout comes in sanded and unsanded varieties. Sanded grout is used in gaps larger than 1/16-inch wide. Because it’s hard to work sand into small tile joints, unsanded grout is used for tiles set close together. Both sanded and unsanded grouts are available dry or pre-mixed, and they come in a wide array of colors. Latex-modified sanded grout is more water-repellent than regular sanded grout and is a common choice for bathroom floor tile. Epoxy grout is more durable and water-resistant than cement grout, but it is more difficult to work with.

Miscellaneous Materials

Although these miscellaneous tile materials are optional, they certainly make the job easier or help the finished product last longer. Spacers are small pieces of plastic that go between the tiles during installation to keep the tile spacing symmetrical. Cement board is useful for slightly uneven or unstable floors. It provides a thin, hard surface ideal for tile. You can install cement board over vinyl flooring, allowing for installation of ceramic floor tile without removing the old flooring. Grout sealer is a clear, protective finish that helps prevent water absorption and staining of the grout. Tile sealer works to coat and protect tile which is useful for sealing porous tile, such as terracotta, prior to grouting. Tile sealer is not needed for glazed ceramic tiles.

Tiling Tools

Floor tile installations require both common and tile-specific tools. You need a few easily accessible tools such as a tape measure, a chalk line and a level. Tile-specific tools include a notched trowel, a rubber grout float and grout nippers. Wear safety glasses when using a tile nipper. You may find a grout bag is helpful for getting the grout into awkward places. You will need some sort of tile cutter. A portable tile cutter works with most ceramic tile, but you may need to use a wet saw if working with marble or granite tile.

Tile Installation

Ready To Use Tile Adhesive

Tile adhesive is ready-mixed and specially formulated from OPC, selected fine sand, and additives to improve its essential properties for laying tiles. High performance tile adhesive can be used to lay tiles on existing tiles, on polished cement, on wooden substrates (with the use of primer), or on other special substrates.

Easy to use

It’s very easy to use tile adhesive, it will be already ready to use after just mixing with water. Bagging product makes it convenient for transportation process, providing low dust and clean working space. Tiles are not needed to be soaked, just un-box them and lay.

Fast

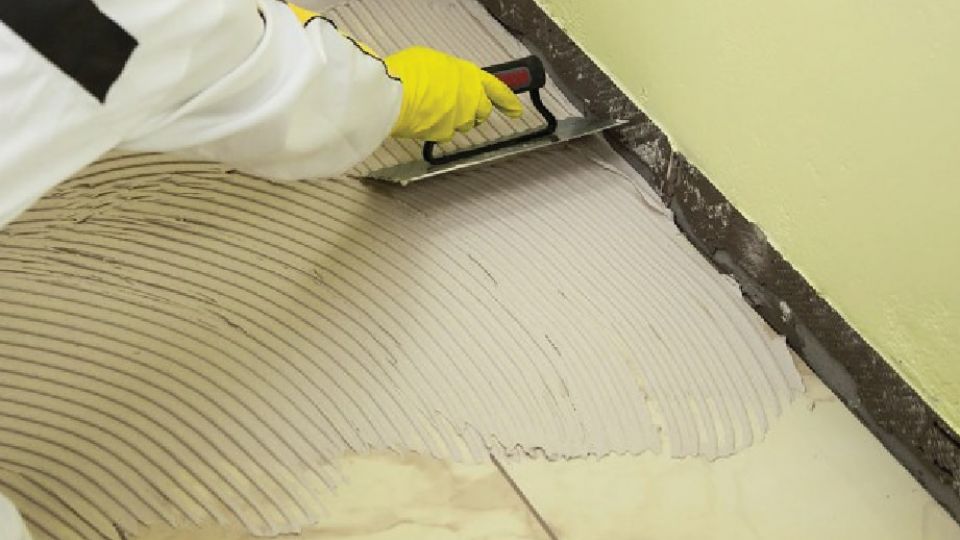
Notched trowel is normally and efficiently used to apply the mixture of tile adhesive on the area of about 1 m2. Tiles are then continuously laid onto notched adhesive and quickly adjusted into the lines.

Working quality

0ptimum setting time of tile adhesive allows tiles to be easily adjusted within a certain period of time. It makes tiles being laid in line and gives the aesthetic final look. Applying tile adhesive with notched trowel provides full spread on back of tiles and will reduce many problems like broken tiles esp. on the corner, water seeping, and stain or efflorescent. Full contact of the adhesive on tiles’ back and substrate provides strong bonding strength and long lasting tiling work.

Variety of work

Tile adhesives are formulated according to specific applications such as to lay tiles, glass mosaics, large-size granito (up from 60 x 60 cm), to lay tiles on polished substrates, on dry wall system, on existing tiles without removing them, on external areas, parking areas, industrial areas, in swimming pools, and many more.

Economical reasons

Laying tiles by using tile adhesive with notched trowel requires less amount of material. Adhesive layer is a lot thinner than the mixture of sand-cement, and this leads to lighter load to building structure. A bag of 20 kg tile adhesive can be used to lay tiles on the average area of 4 – 5 m2. A bag of 25 kg tile adhesive can be used to lay tiles on the average of 6 – 7 m2.

Area coverage depends on substrate smoothness, working tools, and skill of tilers.

How Do I Choose Good Quality Of Tiles?

Following are the points need to be checked for tile works,

1. Living, Dining, Kitchen & Bedrooms – Flooring:

  • Tiles should be laid with zero slope. So overall area should be in level without any slope or undulations
  • Levels between tile joints should be equal; Tile joints spacing should be equal.
  • Tile joints has to be filled with suitable grouts. Check the grout for proper filling, i.e., without gaps, undulations & colour variation
  • Tile damages & chip offs has to be checked; Colour variation has to be checked.
  • Skirting tiles – offset from wall should be equal; edges & corners should not be sharp; floor tile’s joints line should match with skirting tile; Also check for damages & colour variations
  • Hollowness – randomly tap on the tiles and observe for hollow sound.

2. Toilets, Utilities & Balconies (TUB) – Flooring:

  • Slope: Check floor slope by poring a bucket of water. Water has to drain fully with in two minutes.
  • Check for the position of floor trap; it should be placed such a way that it facilitates water draining properly
  • Levels between the tiles should be equal; Tile joint spacing should be equal.
  • Tile joints has to be filled with suitable grouts. Check the grout for proper filling, i.e., without gaps, undulations & colour variation.
  • Tile damages & chip offs has to be checked; Colour variation has to be checked.
  • Skirting tiles – offset from wall should be equal; edges & corners should not be sharp; floor tile’s joints line should match with skirting tile; Also check for damages & colour variations
  • Hollowness – randomly tap on the tiles and observe for hollow sound

3. Toilets, Utilities, Balconies (TUB) & Kitchen – Walls:

  • All walls should be in plumb and right angle
  • All the corners has to be filled with Silicone sealant (Sanitary Sealant)
  • Levels between the tiles should be equal; Tile joint spacing should be equal.
  • Cut tiles around the plumbing fixtures & Electrical boxes should be cut in proper shape and the cut edge should not be visible after fixing Plumbing & Electrical fixtures
  • Tile joints has to be filled with suitable grouts. Check the grout for proper filling, i.e., without gaps, undulations & colour variation.
  • Tile damages & chip offs has to be checked; Colour variation has to be checked.
  • Hollowness – randomly tap on the tiles and observe for hollow sound.

Pros of SnapStone Porcelain Flooring

  • Installation is easy. This is the main advantage to SnapStone, and it is a big one. This is a very easy floor for DIYers to install.
  • Better sound-deadening. The bottom tray layer on SnapStone is made from a rubberized material that deadens sound transmission. This is a quieter floor than traditional ceramic tile.
  • Can be installed over existing flooring. While tear-out of old flooring is often necessary with traditional ceramic tile installation, SnapStone can be installed over wood, vinyl, or concrete floors.

Cons of SnapStone

  • Limited selection: Although selections have increased in recent years, there is still a relatively small selection of SnapStone when compared to thousands of colors and styles available in standard ceramic tiles. Currently, SnapStone offers 14 types of 6 x 6-inch tiles; 3 types of 18 x 18-inch tiles; 27 types of 12 x 24-inch tiles; and 7 types of 6 x 24-inch tiles.
  • More expensive. SnapStone costs $5 to $7 per square foot when purchased from a home center. Even when you consider that you won’t have to buy cement board underlayment, SnapStone is more expensive than most stock ceramic tile. But costs are still more reasonable than for many high-end designer porcelain tiles.
  • The floor flexes. Unlike a mortar or thin-set installation, a SnapStone floor will flex somewhat underfoot. This is one reason why this system uses a flexible urethane grout rather than traditional mortar grout, since grout lines would crack without a flexible filler. This tendency can be countered somewhat if the subfloor is very solid and well constructed.
  • Structural reinforcement may be necessary. SnapStone installation guidelines carefully delineate how much floor deflection is allowable in the floor framing. This may require additional carpentry work if the floor is too bouncy.

Unsuitable or Poor Materials

Some materials should be avoided as underlayments for ceramic tile:

  • Interior-grade plywood: This kind of plywood will swell upon contact with water, so it is best to avoid it as an underlayment.
  • OSB sheets: Like interior plywood, OSB does not perform well with water.
  • Multiple layers of vinyl: One layer of the vinyl floor is fine. More than one layer isn’t.
  • Perimeter-bond vinyl: Sheet vinyl must have a full bond over its entirety in order to serve as an underlayment for ceramic tile.
  • Hardboard: Hardboard sheets such as Masonite do not bear up to any moisture, so avoid them as an underlayment for ceramic tile.
  • Drywall or greenboard: Although ceramic tile is sometimes installed directly against drywall or greenboard in the wall applications. It should never be used as an underlayment for floors.

Top Tips For Picking A Kitchen Faucet

Things That Make A Great Kitchen Faucet

It’s one of the most important components of any kitchen. Apart from improving the quality of your kitchen, a great faucet will also make your

Kitchen Function Well and Look Great

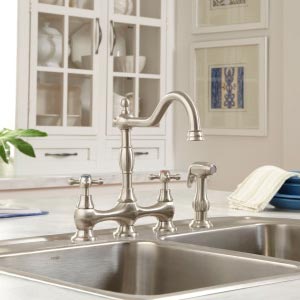
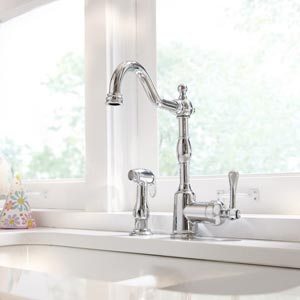
Purchasing a new kitchen faucet is one of the most interesting upgrades you can make. Whether you just want to personalize your kitchen or you just want to replace a damaged one, there is something out there for everyone. However, with so many brands and models on the market, choosing the best kitchen faucet can be overwhelming and sometimes confusing. So, what makes a kitchen faucet great? Here are some tips to consider.

Has a Brand

When it comes to choosing a faucet for your kitchen, it’s always advisable to choose a product with a strong brand name. Why should you even consider a non-branded product?

Some people assume that they will save money by avoiding the top brands. However, that is not always the situation. In fact, you might end up spending more money than you had initially saved.

Most of the non-branded faucets tend to have a short life. They start showing signs of wear and tear within a few months.

Low-quality faucets leak, drip, break and waste your water, which will eventually lead to higher utility bills. Therefore, you should not that buying a branded product doesn’t mean you are paying for the name.

Aligns with Your Kitchen’s Décor

In the modern kitchen, a faucet plays a vital role towards its looks and appeal. As much as reliability and functionality are the main priorities, looks are equally important. After all, all the major brands are producing reliable and functional faucets. What sets apart a great kitchen faucet brand from a common one is the issue of design. Respectable brands have realized that the modern consumer is paying more attention to design when choosing a kitchen faucet. Therefore, if you are choosing one for your kitchen, then you should also consider how it will align with the rest of the components.

Easy to Install and Operate

Installing a kitchen faucet should not consume more than 10 minutes for someone with basic DIY skills. Once you dismantle the old one, you just get the hoses through the holes drilled in the sink, put the faucet in its position and then fasten it from beneath using the attached screw nuts.

Having completed that phase, you should then proceed to attach the ends of the hose to the cold or warm water supplies. Its handle will adjust temperatures automatically while allowing the stream to flow precisely and steadily. You can even direct the stream in various areas on the kitchen sink.

Should Be Leak-free for Lifetime

Changing gaskets and washers after every few months belongs to the past. Also, the valves used in modern kitchen faucets have significantly evolved.

Most faucets now contain hard ceramics as valves, which are sometimes covered with diamond. With the use of these valves, it’s almost impossible for them to wear out as fast as they used to.

Also, they don’t leak their entire lifetime. Therefore, if you find yourself constantly changing gaskets and washers, it’s time to invest in a quality kitchen faucet, and you will not come across such issues anymore.

Apart from saving you money and time, the best kitchen faucet will also ensure a stream and precise water flow.

Deep Clearance

If you have a low kitchen faucet, you may not be able to wash large pots under it. You will be forced to change its position in the sink severally, to ensure it’s evenly washed. While that may not be a big issue, why should you struggle while there are better options on the market? When you are choosing a kitchen faucet, height clearance is one of the biggest considerations to make. To obtain the best value for your money, you can use the largest accessory that you have in your kitchen, which needs to be washed in the sink. You should then use its measurements to determine the height of the faucet’s arch.

Easy to Clean

Just like other kitchen appliances, you need to clean your kitchen faucet regularly. Cleaning prevents the accumulation of dirt, oils and other sediments from the utensils.

However, the cleaning process should not consume an entire hour. A few wipes with a cloth or sponge should be enough to clean it.

Also, the best kitchen faucet doesn’t develop stains that require special cleaners. In addition, fingerprints should not stick.

New Faucet, New Sink, or New Kitchen?

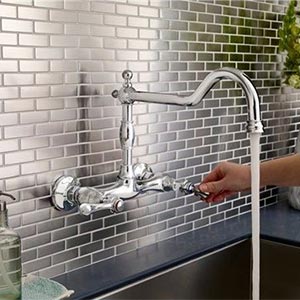
The first thing you’ll want to figure out is the mount-type you need (or want): sink deck, countertop, or wall. This depends on whether or not the sink is going to be new as well – a new sink gives you more freedom to choose where the faucet goes (especially if it’s part of a wider remodel or new build).

For a New Sink

  • If the faucet is for a new sink (and won’t be mounted on the wall), hold off on the sink until you find the faucet you want. Why? With most sinks, you can specify the number and location of holes on the sink deck – leaving you free to pick nearly any (deck-mounted) faucet you see. Purchase the sink too soon, and you’re stuck with the configuration originally selected.
  • Look out! Some sink materials allow for extra holes to be drilled at home, and may even come with scored knockouts to make the process easy. But due to the risk of cracking and damage – particularly with fireclay, cast iron and natural stone sinks – creating your own holes should be avoided if possible.
  • Likewise, faucets being installed in a new countertop should also be decided upon before finalizing the counter installation to make sure holes are drilled where they’re needed (some countertops can be difficult to modify on your own).

How to Measure the Faucet Hole Size?

The best way to measure the inside diameter of the faucet hole is to use a Slide Caliper. The measuring accuracy for this type of tool ranges from +/- 0.001″ to +/- 0.0015″ (+/- 0.02 mm to +/- 0.04 mm). Thus, using this tool to measure faucet holes would yield in accurate results. 

  1. Place the inside jaw of the caliper against the inside of the faucet hole.
  2. Slide the scale outward until it reaches the maximum distance.
  3. Slide the caliper out and the reading indicated would be the size of the faucet hole in diameter.

Repair or Replace Faucet?

Many times, the decision to replace faucets is an aesthetic one. When remodeling a bathroom or kitchen, it’s important to match the sink, shower, and tub sets to the rest of the design.

In addition to taste and style concerns, there are also plenty of practical reasons to replace your faucet as well.

  • Cracked, discolored, chipped, or otherwise damaged
  • Worn out or corroded parts, making repairs difficult or impossible
  • Replacing things like washers, aerators, nuts and bolts doesn’t fix the problem
  • Faucet repairs are over 30% of the cost for full replacement
  • Replacing a sink, tub, or shower
  • Ugly and outdated (aesthetic reasons)

If you are replacing a sink, tub, or shower, it’s a good idea to replace the fixture as well. Replacing a faucet, however, does not necessitate a fixture replacement. You can add new faucets without having to replace any other plumbing parts.

Holes in a Sink

A three-hole sink is a common bathroom faucet hole size and is also a common type of kitchen sink. Faucets used on a three-hole sink usually have a plate or a base, called an escutcheon, which covers the holes. An escutcheon can also be used to cover the extra holes when installing a single-hole faucet in a three-hole sink.

A four-hole sink is the most common type of kitchen sink. It is similar to a three-hole design with an extra hole set a little further away for a sprayer or soap dish. A two-hole sink is designed for a single-hole faucet and a sprayer or soap dish with no escutcheon. A one-hole sink is used with a single-hole faucet, usually without an escutcheon.

A Few Home Electrical Safety Inspection Violations That Could Cost You

A Bad Report:  Red Flags to Look Out for in a Home Inspection Report

Like most homes, you should expect your current or future abode to have at least some minor cosmetic issues, like loose siding or peeling paint. While these issues are easy enough to repair, some conditions are more difficult and costly to address. You may want to have the homeowner make the fix before you go through with the sale, or you may want to negotiate your price to cover the cost of completing the repairs yourself. In some cases, you may even want to hire a specialist to look at the problem before moving forward with the purchase.

So, before you write that check and sign those papers, be sure to look out for these seven red flags on your home inspection report. 

Pests

It’s important to know that not all home inspectors are qualified or licensed to do the pest portion of the inspection. While identifying an active termite infestation is relatively easy, other pests and wood destroying organisms (WDOs) take training and expertise to identify properly. Look for a pest control professional near you who is familiar with regional species and is licensed to perform a home inspection for sales purposes.

Mold

If your inspector finds water damage or mold in your home, that’s a red flag. In truth, most homes will have some mold in crawl spaces and attics, and not all mold is bad for your health. However, mold can indicate other problems, like water leaks from the roof or major appliances, that could be costly to correct. So, finding the source of the mold is imperative. Otherwise, the problem could worsen, and you could end up with a health hazard. A certified mold inspector near you can tell you what type of mold you have, how harmful it is, and what to do about it.

Fireplace & Chimney

Homes with fireplaces are almost always in high demand. However, if the fiery feature hasn’t been cared for properly, it may be a liability instead of a luxury. A clogged flue or a leaky chimney is a fire hazard. That’s why experts recommend having your fireplace and chimney inspected annually, and that’s why you may want to consider hiring a local fireplace inspector who can evaluate the safety of the fireplace in a home you are considering buying. If they identify any problems, the same pro can usually quote the necessary repairs, allowing you to negotiate the purchase price accordingly.

Electrical

A broken outlet or a flood light that doesn’t work is one thing, but outdated wiring or too little voltage is cause for concern. In addition to the inconvenience of not being able to hook up all your electronics and appliances, problems with your electrical setup can increase your risk for a home fire. Updating your wiring and upgrading your electrical service are costly projects that require permits, professionals, and inspections to bring up to code. You’ll want to address these major issues with the seller’s agent before going through with the transaction.

Foundation

If your home inspection report lists concerns with the integrity of your home’s foundation, don’t ignore them. Contrary to popular belief, not all foundation issues are expensive to fix. Minor foundation cracks could cost you as little as $500 to repair. However, major structural problems that require stabilization using hydraulic piers can cost $10,000 or more. Depending on what’s wrong, you may want to renegotiate your purchase agreement.

Water Damage

“The three biggest things that are bad for a house are water, water, and water,” said Buell. When water gets into a home’s vicinity, it can cause a range of major issues, most of which are red flags for buyers. Water in the basement can be a sign of structural damage, roof leaks or plumbing issues can cause water stains on walls and ceilings.

Damage to the Roof

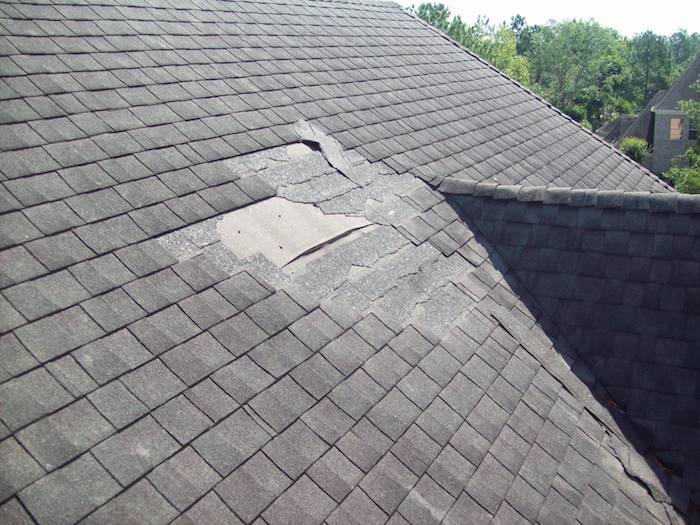
A strong roof is necessary to protect a home from weather elements, so a damaged roof could seriously affect the sale price of your house. A roof can last for up to 25 years but it’s wise for homeowners to inspect their roofs once a year.

Plumbing Related Problems

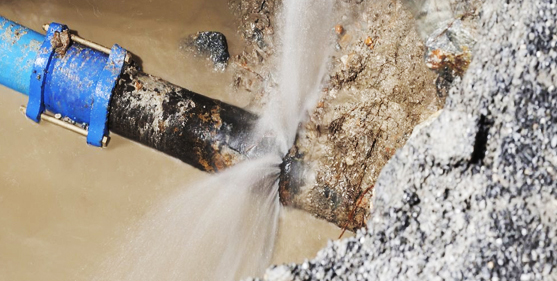
As previously mentioned, water is a homeowner’s worst enemy. It can be hard to notice major plumbing issues until an inspector comes in. Redoing a house’s plumbing can cost tens of thousands of dollars, and minor leaks or rusted pipes could be a sign of bigger plumbing issues.

How to Prepare for a Home Inspection

As a seller, it’s common to get nervous during the home inspection process. You don’t want the deal to fall through, nor do you want to be stuck with the cost and burden of repairs if your buyer requests them as a contingency. Fortunately, there are some things you can do to prepare for the inspection.

Provide open access to areas that need to be checked

Make sure that the home inspector has easy access throughout the property. If they can’t get to an area, they can’t inspect it, and that will be a red flag for buyers. Clear away any clutter impeding access to areas or systems that the inspector needs to take a look at, including basements, attics, furnace rooms, and under sinks.

Clear the perimeter

In addition to checking the interior functioning of your home, the inspector is also going to be looking at the exterior, including siding, trims, and caulking around windows and doors. You’ll want to leave areas around your home clear of plant growth, trash cans, and stored items so they can get an unimpeded look.

Replace any bulbs that are out

A blown bulb suggests two things to a home inspector: either the bulb itself is out, or there’s something faulty in the fixture’s wiring. The inspector will either have to waste time determining whether a fixture is inoperable or they’ll simply note that there’s a possible defect without looking further into it. Avoid both of these scenarios by making sure that all of your bulbs are in working order.

Ensure the fuse box is properly labeled

A confusing fuse box is frustrating for homeowners and home inspectors alike. Double check that each switch in the box is labeled clearly and correctly, and replace any labels that are incorrect or difficult to read.

Be Honest with Inspector

First off, the home inspector should ask if there are any major issues with the home. Be honest and tell them what you know. They will find the issue either way. Worst-case scenario, they find an obvious issue and tell the potential buyers. The buyers now see you as a dishonest seller and may reconsider, even if the home passes the inspection. As always, it’s better to be honest up front.

Remove Clutter Around the Home

Sometimes, a happy home inspector can make all the difference. Therefore, make sure it’s easy to move freely about the home. If you have heavy boxes in front of the attic or around the furnace, move them before the inspection. Clutter can’t hide home issues, but it can certainly make for an unhappy inspector and longer examination.

Monitor the Exterior

Homeowners care about their curb appeal and that means the home inspector will examine the exterior as well. They will look at the landscaping, grading, driveways, fences, windows and sidewalks. Other than a major grading or driveway issue, all these issues can be fixed yourself. Do yourself a favor and make sure your home’s exterior looks better than ever

The 7 Most Common Home Inspection Problems

Basement dampness—water stains, powdery residue on walls, mold or mildew.

  • The cure: Repair gutters to channel water away from house; apply waterproof coatings to basement.

Roof problems—brittle or curled shingles; broken or missing flashings.

  • The cure: Apply new shingle, or tear off if needed (usually after three re-roofs ); replacing flashings, especially around chimneys and other protrusions.

Foundation flaws—cracks in foundation, sloping floors, sticking doors or windows.

  • The cure: Fill cracks with silicon caulking or epoxy; apply waterproof coating to exterior.

Poor upkeep—needs repainting, worn carpeting, cracked driveway.

  • The cure: Give the house a minor facelift.

Faulty plumbing—inadequate water pressure, slow drains, signs of leaks on ceilings.

  • The cure: Clean and rout drains; reseat toilet with new wax ring, repair leaks.

Poor ventilation—extreme heat in attic, vapor condensation.

  • The cure: Ensure that roof soffits are not blocked; install additional roof vents; vent bathroom and kitchen fans outside.

Defective heating—cracks in the heat exchanger or water tank; carbon monoxide leaks.

  • The cure: Reseal chimney flues; replace sacrificial anode in water heater.

Feel Safe With The Right Truck Tires

How To Pick The Right Tires For Your Truck

Different tires can yield completely different outcomes in terms of truck characteristics, performance, and limitations. The variety of truck tires available means that there’s definitely a set out there that fits your priorities and the way you use your truck or SUV – it’s just a matter of finding ‘em.

All-season (on-road performance focus)

While there are exceptions to the rule, the vast majority of original equipment (OE) truck tires are all-season tires, which focus on on-road performance. If your truck was equipped with all-season tires from the factory, then you probably have plenty of miles to reflect on. From a performance standpoint, have you been satisfied with the experience? Or did the tires fall short off-road, through wintertime, or in any of your other driving contexts? Were they a hauling or towing limitation?

All-terrain (balanced on/off-road performance focus)

All-terrain truck tires are for people who use their truck to work and/or adventure. All-terrain tires are ideal for drivers who split their time on- and off-road, or in other driving contexts where extra durability and higher performance limitations are advantageous.

Mud-terrain (off-road performance focus)

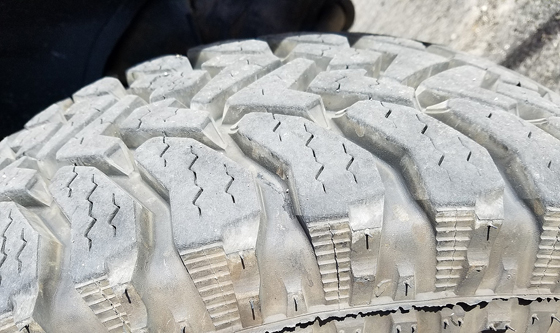
For maximum off-road performance and the most aggressive look, mud-terrain tires are the way to go. Though they’re sometimes used on-road by everyday drivers, mud-terrain tires are engineered to accumulate the majority of miles in challenging off-road environments. Therefore, the ideal mud-terrain tire user spends up to 80% of the time off-road, and about 20% on-road.

The on-road drawbacks of all-terrain tires detailed above are typically amplified with mud-terrains. See All-terrain tires vs mud-terrain tires for an in-depth analysis. However, recent progress with noise-canceling tread pattern technologies has made mud-terrain tires more livable on an everyday basis than ever before. The comfort advancements have given rise to “hybrid” tires like the Nitto Ridge Grappler and Toyo Open Country R/T, which combine the best of all-terrain and mud-terrain tire technology.

Choosing the Right Tire

Having the right tire on your pickup can improve performance and be one of the best safety strategies you can employ; having the wrong tire on a pickup truck can ruin a good day. Not to overstate it, but tires are one of the most important components on your vehicle, and knowing a few basics will ease the tire selection process. Choosing the right tire can be a daunting task as there are so many options and pieces of information to keep in mind

Tire Markings

All tires are marked with the width, sidewall height ratio or overall height, rim size and load range. An example of what you might see on the sidewall is LT315/70R17 121/118O

Load Ratings

Tires get several load ratings; here’s what those letters on the tires mean:

P stands for passenger in a P-metric tire. These tires are great for lighter loads and highway use. Generally, they weigh less and cost less than a light truck tire and provide the vehicle with a smoother ride and better gas mileage. The downsides are that P-rated tires can’t handle as much of a load as LT tires and they are more easily punctured.

LT stands for light truck tires. Terminology is a little confusing in the truck market because many manufacturers label their pickup trucks as heavy duty. Class 3 trucks such as the Ford F-350, GMC 3500 and Ram 3500, and smaller, are all considered light trucks. Medium duty refers to Class 4, 5 and 6 trucks such as the Ram 5500 or Ford F-650. That leaves heavy duty for the 18 wheelers and big rigs. That means LT tires are made for HD pickup trucks.

Tire Tread Types

HT (highway terrain): HT tires are designed primarily for paved roads. They have shallow tread depths and very little or no shoulder and sidewall blocking. HT tires are typically fuel efficient and quiet. Since they don’t need to offer high traction for off-road use, they can be made with harder compounds, decreasing rolling resistance, to last a long time. These are usually the most cost-effective tires because they have a lower purchase price, get better gas mileage and last longer than any other truck tire type.

AT (all terrain): AT tires are just what their name implies, tires designed to be good in as many conditions as possible. AT tires have deeper tread depths and significant shoulder and sidewall blocking. The tread has larger spaces or voids than an HT to allow mud and snow to clear out of the tire. If the vehicle spends time driving on logging and forest service roads, then an AT tire would be a good option. AT tires are a little louder than HT tires. They weigh a little more and get a little worse gas mileage as well. AT tires cost more than HT tires, but provide better all-around performance in bad weather and on dirt or gravel roads.

Tire Buying Tips

Perhaps the biggest mistake a consumer can make when replacing tires is not using the correct size. On the sidewall of your tire, you’ll find a code that tells the tire’s size and capabilities

Here’s a sample code:

P195/60R16 63H M+S

P – Type of tire

195 – Width of the tire across the tread in millimeters

60 – Aspect ratio of the sidewall compared to the width

R – Radial construction

16 – Diameter of the rim in inches

63 – Tire’s load rating

H – Tire’s speed rating

M+S – Tire is suitable for all-season driving

If the tire-size code starts with LT instead of P, it means the tire is a light-truck tire. Light-truck tires are designed to have higher-load carrying capacities and are usually found on pickups and SUVs. These vehicles are not required to have LT tires, and in many cases, the original-equipment specification calls for passenger-car tires.

The speed rating translates into the tire’s ability to dissipate heat, or prevent heat build-up. Heat is a tire’s enemy. The more heat, the faster the tire wears, and the faster a tire might break down. A tire with a higher speed rating can dissipate more heat on long highway trips. If a consumer were to spend little time on the highway, the speed rating might not be an important factor in choosing a replacement tire.

Tires are speed rated from 99 to 186 miles per hour (159.3 to 299.3 kilometers per hour). The most common speed ratings are T (118 miles per hour or 189.9 kilometers per hour) and H (130 miles per hour or 209.2 kilometers per hour). Both of those ratings clearly exceed the nationally posted speed limits and would make excellent long-distance highway tires. If a consumer were to drive only in urban situations at low speeds, a tire with an S (112 miles per hour or 180.2 kilometers per hour) speed rating might be completely acceptable.

How to Choose the Right Truck Tire

Choosing the right tires for your vehicle is an important decision. When you drive a light truck, SUV, or crossover, the tires you choose can have a direct impact on traction, comfort, road noise, tread life, and durability. Here’s a quick guide to help you decide what truck tires are the right fit for your on- and off-road needs.

H/T (Highway Terrain) Tires for Daily Commute and Highway Driving

Chances are your SUV, crossover, or light truck came standard with a set of H/T tires built for highway driving. If you don’t plan on going off-road, and want a tire that’s great for dry and wet road conditions, then an H/T tire is probably a good option

A/T (All-Terrain) Tires for On- and Off-Road Performance

Drivers who regularly find themselves taking dirt and gravel roads in between long stretches of highway driving, should look at A/T tires. This includes folks who like to take the road less traveled on their way to a great camping spot or other outdoor activity

M/T (Mud Terrain) Tires for Off-road Enthusiasts

You know who you are. You drive a rig that is either lifted or already offers plenty of clearance for your favorite pastime: driving in extreme off-road conditions, including mud, dirt, gravel, and rock. Or maybe you just like the way a set of rugged, aggressive tires looks on your vehicle, even if they never leave the blacktop. Either way, M/T tires are for you.

Choosing the Right Truck Tires

If you are looking for a way to increase the performance and economy of your vehicle, then perhaps the best way is to buy new truck tires. However, selecting the right truck tires can sometimes get difficult, as there are a huge variety of options available and budget can be an issue.

MANUFACTURER’S RATINGS

Take a look at the manufacturer’s ratings, before actually buying new truck tires. This is because the ratings of these tires are made to suit the performance of your vehicle. The ratings are usually shown in metric on the side of your original truck tire. You can see all the information regarding the size and width of the tires suitable for your truck.

DRIVING CONDITIONS

Similar to buying new tires for ordinary cars, the driving conditions of your truck hold great importance when buying new tires. It is recommended to buy all-weather year-round tires for trucks, as they last for years. However, if you usually drive off-road or in wet weather conditions, the best option is to go for off-road truck tires

TRUCK TIRES SPEED RATINGS

When it comes to buying truck tires, it is necessary to take a look at the speed ratings. If you usually drive at speeds of 150mph, the best option is to go for “V” category truck tires. But since there are few chances of you to driving at speeds so high, it is best to go for tires which offer a speed rating of up to 130mph. These tires are cheaper as compared to the truck tires which have higher speed ratings

So, now that you are familiar with the tips mentioned above, choosing the right tires for your truck won’t be a problem at all.

The Pros And Cons Of Doing Your Own Bookkeeping

How to Choose the Right Bookkeeping Services

Hiring Internally

While hiring an employee to take over bookkeeping may seem like a good way to keep control of your finances and the people managing them, this method often falls short in execution. For businesses without an expertise in managing bookkeeping procedures, accounting software or financial analysis, managing bookkeeping internally can be a recipe for disaster.

Hiring Freelancer or Part-Time Bookkeepers for Bookkeeping Tasks

What kind of education and experience does a freelancer have? The answer varies greatly from one worker to the next. You want to ensure your bookkeeper has professional education in the field, along with relevant experience and a good track record. Certification, licensing and insurance should all be investigated. If a freelancer makes a mistake while working for your business and doesn’t have liability protection, you’ll likely be left holding the bag. In addition, if your freelancer is working off-site, say from a home office, you’ll have to find a way to provide adequate oversight in order to prevent account mismanagement and serious mistakes.

Hiring CPAs

Hiring a CPA to do a bookkeeper’s job is usually a serious waste of resources. Not only that, but accountants rarely enjoy the work. Instead, consider hiring a CPA to advise you on financial matters requiring more expertise, like filing taxes or managing investment funds. CPAs regularly work with bookkeeping services, and may be able to recommend professionals who can fill a daily accounting role for your business at a much lower price.

Hiring Professional Bookkeeping Services

Finally, there are bookkeeping service companies that manage daily accounts for multiple businesses. They often employ CPAs for management roles to provide adequate oversight and counsel for a bookkeeper who runs into a problem. Because they work with a variety of clients, these services often have access to a wider range of tools, and because they employ so many people, they have a better chance of having the experience needed by your business. Additionally, leveraging connections to industry experts and accounting technology companies can provide extra benefits to businesses.

How to choose the right bookkeeper for your business

Good industry knowledge

The responsibilities of a good bookkeeper include managing the critical financial aspects of a business. Although the bookkeeper skills needed for a business—which includes familiarity with business trends and updates and how it relates to the current financial situation of the business—are not essential in bookkeeping, it pays to find a bookkeeper with a wide berth of knowledge of the industry in which the business operates.

Willing to regularly update industry knowledge

Good knowledge and experience is important, but so too is having knowledge that is consistently up-to-date. Of course, while bookkeepers are required to be always updated regarding financial regulations, however a good bookkeeper must be willing to update their current industry knowledge and be able to keep the business at the forefront of its industry as well.

Reliable

Reliability is possibly one of the most important bookkeeper qualities that a business owner should look for. While it is certainly a good thing if a potential bookkeeper has all the right credentials and experience, it doesn’t necessarily mean that they would be reliable from the get-go.

Qualities to Look for When Choosing Your Small Business Bookkeeper

Prioritizes You

At the end of the day, you need a seasoned bookkeeper who’s willing to work for you. Making your business a priority means being respectful of your time, maintaining a proactive approach to communication, and demonstrating the capacity to understand your professional objectives. Taking some time to investigate their customer service habits and client relations will ensure you choose the small business bookkeeper most likely to help you meet your financial goals.

Sees the Big Picture

Beyond suggesting valuable, money-saving strategies to maximize tax deductions, and minimize penalties and late fees, a bookkeeping service that demonstrates big picture thinking can dramatically improve your long-term profitability. Remember, your success hinges on knowing the true costs of running your business.

Understands Your Industry

Beyond the day-to-day management of your company’s accounting activities, your outsourced bookkeeper should have a solid understanding of the industry you’re in, and how it relates to your specific financial situation. The more familiar they are with industry trends and operations, the more likely a bookkeeping company is to spot oversights and patterns in your data. And that can prevent reporting errors, and help you to capitalize on potential tax savings.

Good Communicator

Some bookkeepers are much better with numbers than they are with people, but the right bookkeeping service for your business must be adept at dealing with both. Make sure your bookkeeper listens well, and explains things in a way that makes sense to you. Your business is as individual as you are, and a bookkeeper who adopts a one-size-fits-all approach to communication will be unlikely to meet your needs or expectations.

Choose the Right Bookkeeper

Trust & Security

Bookkeepers have access to much of the most critical personal/private information regarding a company. Considering bookkeepers maintain all of the essential financial records of a company, they’re frequently a pivotal individual for making sure there are no issues with invoicing, payroll, and taxes.

Certification

You should always hire a fully licensed and certified bookkeeper. In an attempt to save money, some businesses feel tempted to hire unlicensed individuals to maintain their books. Hiring uncertified bookkeepers can be a shortsighted mistake because even though unlicensed bookkeepers might save you money in the short-term, they are more likely to make errors and cost you money in the long-run.

Excellent Communicator

A bookkeeper is a person you rely on to keep track of your numbers; therefore, this is an individual that you’re going to be in communication with regularly. Some bookkeepers might be excellent at keeping track of the numbers, but if they fail to communicate with you, they can still be a detriment to the overall well-being of your company. Part of being an excellent communicator is being a fantastic listener, so your bookkeeper should be attentive and interested when you’re discussing the details of your company. Ultimately, you and your bookkeeper should have a harmonious relationship that allows for information to routinely and accurately flow between the two of you.

Organized

A bookkeeper is a financial record keeper, and they need to maintain a filing system that reflects the importance of their job. There should be an immediate answer to most financial questions that you might have for your bookkeeper. If a bookkeeper organizes well, there should never be an issue with answering basic questions regarding company finances and expenditures. A bookkeeper that appears disorganized, or is inconsistent in how they file important company paperwork, should not be trusted to maintain the financial records of an entire business.

HOW TO CHOOSE THE RIGHT BOOKKEEPER FOR YOU

Honesty and Trust:

When looking for the right bookkeeper, these two are most important things to consider when doing your search. A bookkeeper has the role of managing your finances with little input from you the business owner. Since this will be a total stranger handling your finances, it is important to hire an honest person, someone you can trust with your finances. To do this you need to thoroughly vet them before settling for one.

Integration:

Most business owners are moving from the traditional ways of doing business to digital methods and systems. Therefore, when looking for a good bookkeeper, ensure that he or she has a wide knowledge of various bookkeeping software and keeps a keen eye on the different market trends.

Personality:

Your bookkeeper is your closest business ally. He or she can help your business grow by offering financial advice whenever need arises. Therefore, you need to look for an individual with excellent personality. This means he or she needs to be a good conversationalist, someone you can talk with freely, understanding and friendly. The bookkeeper should also be free with you, can ask you hard questions and tell you issues whenever they happen.

The Process Of Hiring A Wedding Photographer

STEPS TO CHOOSING THE RIGHT WEDDING PHOTOGRAPHER

Create a detailed action plan

Everything from your chosen venue to the time of year will affect your wedding photographs. If you’ve got your heart set on certain shots, like couple’s portraits at sunset or a sparkler send-off photo, then you need to talk it through with your photographer.

Decide on the right style

A professional photographer distinguishes all the subtleties of shooting a wedding. They’ll know exactly when to photograph your groom as he first sees you walking down the aisle, how to achieve the perfect confetti shot, and what to do in the event of rain. A creative and flexible approach often results in the most breathtaking and brilliant wedding photographs.

Browse your photographer’s portfolio

Look through the portfolio of any photographer you’re considering. You won’t just be looking for examples of the weddings they’ve captured. You’ll also be looking at their different styles and approaches. When you find the photos that resonate with you, you’ve found your style and photographer.

Advice For Choosing A Wedding Photographer

Make sure you mesh

Look for an honest, organized, friendly photographer, because that’s who will be spending the day by your side.

Get the details for editing timeline and deliverables

After the last toast and grand exit, the photographer’s work is far from finished. Knowing what to expect in the post-production process will help balance all that excitement and anticipation to relive your best day through photos.

Understand rights to the photos

The permissions and legal intricacies around rights to wedding photos can often be blurry, so any clarification you can get before signing off will benefit both you and the photographer down the line.

Ask the overlooked questions

There are so many questions to ask, but which will yield the most telling answers? To get a good feel for your photographer, here’s one you shouldn’t skip.

Use the engagement photo session as a trial run

An initial shoot with a photographer lets you meet each other in person, gauge chemistry, and see their style firsthand.

How to Choose a Wedding Photographer

Book an Engagement Shoot

Again, not an essential, but you’ll be so much more comfortable on the day if you’ve had some experience of being directed and posing beforehand. An engagement shoot is a great way to all to get to know each other and see if your personalities mesh. Your photographer will be shadowing you for a whole day so if they irritate you or are off-putting, that’s a bad sign.

Narrow Down Your Shortlist

You’ll probably meet with two or three photographers and then need to pick just one. As well as feeling comfortable, the right photographer will come down to price and package options. Consider what is included in the contract (number of hours of coverage on the day, a second shooter, prints or albums, extras like an engagement shoot), how long the proofs will take to get back and retouching options.

Arrange a Meeting

Your photographer is going to be spending a whole day with you – you need to make sure you gel! Meet them face-to-face, ask questions, go through their portfolio and see how you feel with them. Do they put you at ease? Do you feel they understand what you want? The more relaxed you are around your photographer, the more natural and at ease your photos will be.

Do They Know Your Venue?

This is by no means a deal-breaker but it always helps if your photographer has shot at your venue before. It means they’ll have experience of the best locations and know the lighting conditions.

CHOOSE YOUR PHOTOGRAPHY STYLE

Fine Art

Fine art wedding photographers are actively creating art while capturing the story of your day. Every moment has the potential to turn into a photograph that could be a stand-alone piece in an art gallery.

Photojournalistic

The purpose of being a photojournalist is to unobtrusively capture the wedding day as a whole, not just the planned moments. Photojournalism got its start in newspapers, so remember that you won’t get the posed shots if you hire a true photojournalist. If you don’t like posing or staging, then hiring a photojournalist might be the perfect option for you.

Traditional

A traditional photographer appreciates the staples of a wedding and will capture them for you with art and grace. You can expect a modern take on the posed photos in your grandparents’ wedding album. Traditional wedding photographers typically focus on capturing the details that are important to you, including family photos, décor, and other images that you might have on your shot list.

Editorial

If you love the look of photography in magazines like Vogue, GQ, and Harper’s Bazaar, then you might like your wedding to be photographed with a similar feel. Editorial allows photographers to shoot creatively and over the top. While you won’t find candid moments in this style of photography, everything about the editorial look is dramatic, edgy, and sexy.

Moody and Dark

A moody or VSCO-look means that your photographer edits their photos in such a way as to mimic film imagery (or they might be a hybrid shooter — shooting both film and digital). If you love bright, bold colors and want your photos to look exactly how you remember your wedding day (color-wise), then the moody style may not be for you. However, if you’re looking for an artistic, interesting perspective of your wedding day, then this style might be your new obsession.

Adventurous

Think of this style as more of a personality trait rather than a look. If you and your soon-to-be love to travel and explore and are looking for someone who will follow you wherever your wanderlust takes you, then finding a photographer who describes themselves as an adventurer is a must!

Find the Perfect Wedding Photographer

Schedule a test run.

An engagement photo shoot is always a good idea — it’s a great opportunity to get to know your photographer and begin to feel comfortable having your photo taken, especially if you or your groom are camera-shy.

Go with your gut.

Once you’ve evaluated each photographer’s work and fees, and narrowed down the options, it’s time to make your decision. Don’t forget that you’ll be spending the entire wedding day with this person, so you want to make sure you feel completely comfortable with the photographer. Do you and your fiancé genuinely like this person? Do you feel like the three of you click?

Discuss the fee.

Some photographers’ fees include everything including albums, prints, and high-resolution images (saved on a disc or thumb drive); others have a flat or hourly rate, then charge you à la carte for any pictures or albums you want. Many photographers offer a price list that details several different packages they offer at different price points. Make sure that you understand what’s included. Ask how long the photographer will spend with you (seven to nine hours is ideal) and whether there will be a second shooter, as you’ll get more detail shots this way. Lastly, also inquire about when you can expect to receive everything, from a sneak peek of images (some photographers can give you a handful within a few days) to prints (usually up to three months) to your album (up to a year).

Interview the photographers.

Most photographers will email you a link to their portfolio of images before your first meeting. Be sure the collection includes recent weddings he or she has shot from start to finish, not just a “best of” highlight reel from dozens of different weddings. This is a more accurate way to gauge the photographer’s work. Also, ask if the photographer has shot at your venue and if so, request to see those photos. During the meeting, find out who exactly will shoot on your wedding day. Some larger studios employ several photographers, and even with single-person operations it’s not unusual for the photographer to have an assistant handle shots of the groom getting ready while he focuses on the bride and bridesmaids. In all cases, request to see the work of the photographer (or photographers) who will be handling your wedding.

Managing Water Leak And Broken Pipes

PIPES: CHOOSING THE RIGHT REHABILITATION METHOD

The first thing to determine when considering rehabilitation of pipes or manholes is what is the purpose of the rehabilitation. Does the system need structural repair? Does Infiltration/Inflow (I/I) need to be eliminated, does system capacity need improvement? Or a combination? The answers can direct a manager to the most cost effective, efficient use of limited resources.

Aging infrastructures and sanitary sewer overflows (SSO), combined with limited funding and increasingly stringent compliance requirements, make keeping their systems in good working order a daunting task for collection system managers. To accommodate the lack of funds needed to replace large portions of a municipal sanitary sewer system, many managers are investigating techniques for extending the life of their collection system assets through pipe and manhole rehabilitation.

Chemical Grouting

One option for non-structural repair is chemical grouting. Ideally suited to stopping leakage and reducing soil loss, grouting consists of injecting a self-setting grout into structurally sound leaking joints or small wall cracks. The grout travels outside of the joint or manhole wall into surrounding soils and bonds with those soils to create a seal collar of material around the leaking joint or wall defect.

Sliplining

When existing capacity is sufficient, sliplining is a relatively cost-effective rehabilitation method in which a pipe is inserted into an existing line by either pulling or pushing continuous or short-length pipes, frequently HDPE pipe. With traditional sliplining, a lead-in trench is excavated for installation and pipes are butt-welded on the surface of the ground before being winched or jacked into the existing pipe.

Cured-in-Place Pipe (CIPP)

Using a polyester flexible sock or sleeve impregnated with resin that is inverted or winched into the pipe, CIPP liners are considered a trenchless repair. The sock is inverted using winch inversion, water inversion or air (steam) inversion. Inversion allows the liner to conform to the existing pipe contours providing for minor irregularities or slight changes of pipe direction. Increasing the thickness of the polyester sock increases the thickness of the pipe.

Burst/Broken Pipes

Age

In the Charlotte and Greenville areas, our gorgeous old homes and buildings draw tourists from miles away. If you live in an older home, though, make sure that your plumbing isn’t as old as the rest of the house. The same principle applies if you own a historic building. Pipes can wear down with age, and they eventually burst.

Clogs

Our drains collect all sorts of things other than water. Hair, toilet paper, and other items go down the drain all the time. Sometimes, though, those items get stuck. We’ve all dealt with the occasional hair clog, but the really bad clogs can cause pipes to burst. Water builds up behind these clogs, and when the pressure gets too strong, the pipes crack. Stay mindful of drain clogs,and be careful about the items that go down your drains.

Freezing

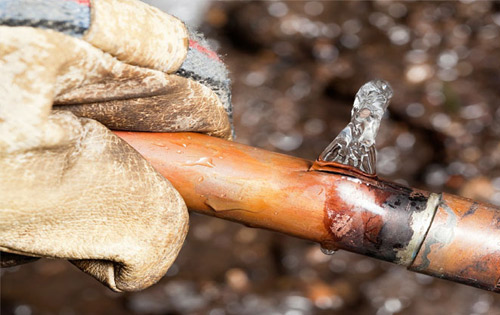
More often than not, when a pipe bursts, it happens in the winter. Compared to many other places, North Carolina has fairly mild winters. However, that doesn’t mean we don’t experience temperatures below freezing. And when that happens, our pipes can freeze, too. When a pipe freezes, so does the water inside it. Waterexpands as it freezes, putting pressure on the pipe and causing it to crack. During colder times, make sure that warm air can get to your pipes. Open the cupboards under the sinks, and insulate the pipes that aren’t near heat sources.

The Problem with Pipe Water

When groundwater floods your basement or when your sewer line backs up, you’ll notice the problem very quickly. Both of these problems are terrible, but once the water is gone, it’s gone. However, if you have water that’s slowly leaking from a broken pipe, there’s no telling how long you’ve had that problem. The water from leaking pipes can find hidden pockets, slipping through cracks and causing damage behind the scenes. Just because you’ve dried the surface doesn’t mean that you’ve gotten rid of all of the water.

Floor Damage

Floors can take on a lot of the damage from broken pipes. Hardwood floors get bent into odd shapes so that the floorboards don’t fit into their spaces anymore. Laminate floors don’t escape damage, either. Constantly dripping water can wear the lamination off the floors. Carpets, of course, absorb water and develop stains

FACTORS TO CONSIDER WHEN CHOOSING A PLUMBING PIPE

Making decisions about plumbing for your property can be overwhelming, especially if you don’t have any previous plumbing experience. Your plumbing material choice is important, as it provides you with one of our most precious resources: water. By gaining a better understanding of the factors you should take into account when choosing your plumbing pipe material, you will be able to make a more educated decision.

WATER TYPE

Depending on where you live, the water going through your pipes may be corrosive. Corrosive water refers to water that dissolves materials it comes into contact with. Corrosive water is problematic in your home because the last thing you want is your pipes degrading only a few years after they’ve been installed. Although the water itself isn’t harmful, when it corrodes copper and metal pipes, it also dissolves copper and lead into the water supply, which does pose health concerns. A water test conducted by a professional determines the level of acidity in your water source.

PLUMBING USE

The amount of water pressure you require is another important determinant in finding the correct plumbing pipe for your property. Chances are, if you are looking for a plumbing solution in a commercial space, you are seeking high water pressure. To maintain high water pressure, a pipe will need to be wide and durable enough to sustain significant force. Plastic pipes are usually the best option in this case, as they are specifically designed for this use.

SOIL CHARACTERISTICS

The composition of the soil surrounding your pipes has significant effects on their durability. Soil with excess rocks, moisture, and abrasive materials will eventually degrade your pipes. It’s also important to look at the chemical composition of the soil. Sometimes, soil with excess minerals can create a reaction when it comes into contact with certain pipe materials.

EXPOSURE TO SUNLIGHT

Sun has similar effects on pipes as it does to our skin. Ultraviolet (UV) rays deteriorate the surface quality of plastic pipes over time, making them more vulnerable to issues and decreasing their lifespan. Excess exposure to sunlight can also cause problems related to changes in temperature. PVC pipes aren’t used to carry hot water, so it’s not a good idea to have them installed in areas that naturally reach high temperatures. To combat this, many plumbers will use insulating materials to prevent temperature fluctuations affecting pipe quality.

The Most Common Plumbing Problems and When to Call a Professional

Almost every homeowner or renter has a few essential tools on hand to cope with minor plumbing emergencies. Many times, a clogged toilet or slow drain may only need a little elbow grease and a plunger to work as intended. If you’re handy around the house, you can generally tackle a small repair such as changing out a worn washer or replacing a drain cover. However, bigger plumbing repair jobs need professional attention. Trying to repair some common issues such as slow drains or leaking toilets could lead to bigger problems later.

Plumbing Maintenance

One way to prevent costly repairs to your home is a regular maintenance schedule. Because many issues with your pipes sneak up on you, a thorough inspection is the key to catching small problems before they grow. Hidden leaks in sink drains or below water heaters are more than just a nuisance; over time, they can cause structural damage. Water that seeps into sheetrock or plaster contributes to mold growth. Porous tile or wood flooring can discolor or warp when wet.

Routine DIY Maintenance Tasks

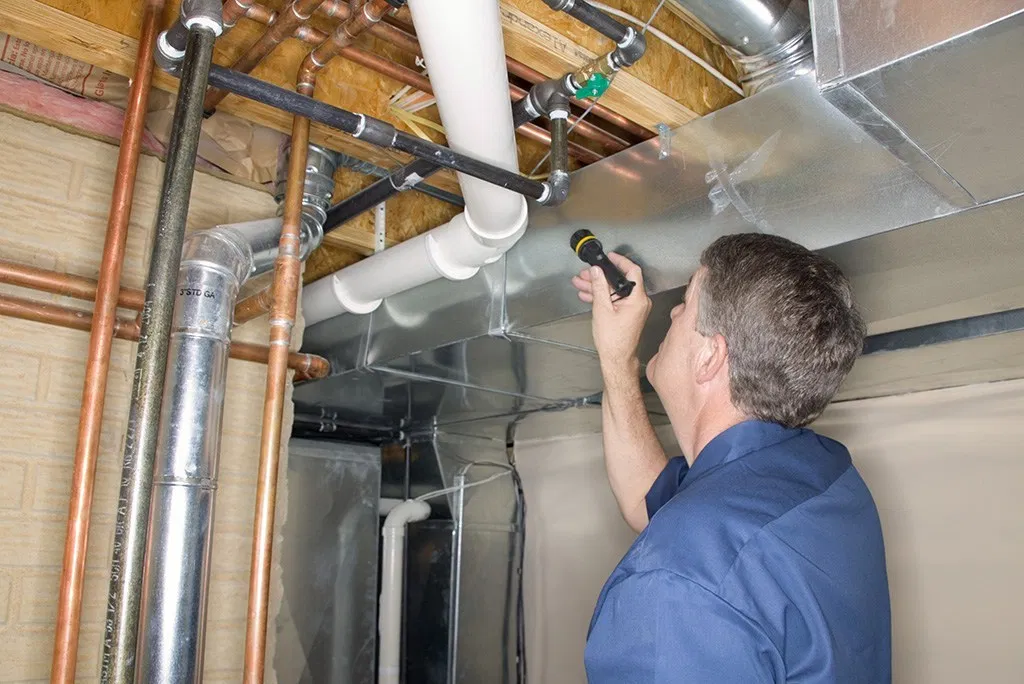
Many routine maintenance tasks are simple do-it-yourself jobs. An inspection is the foundation of any maintenance schedule. You may use your sinks and tubs daily, but you might not notice minor concerns unless you set aside time for an inspection. Go through your home and take a look at your plumbing. Examine all exposed pipes, including under sinks and behind toilet tanks, for any signs of moisture. On a humid day, some condensation on a cold metal pipe is normal, so note any dampness and check the pipes again when the home is cooler. Check for signs of corrosion on brass or copper fittings; corrosion occurs more rapidly on damp metal, so corroded connections could reveal a slow leak.

Professional Inspections

Inspections from a certified Bradenton, FL, plumber give you a more in-depth look at your home’s pipes and drains. Your inspector will check the water heater, garbage disposal and every area of your home’s plumbing system. More thorough assessments might include remote video inspection of pipes, lead testing and filter system inspection.

Common Plumbing Repair Jobs

Even the most thorough plumbing maintenance inspection won’t prevent the occasional clog or leak, especially in older homes. The high water table in the Sarasota and Bradenton, FL area also contributes to septic system problems that can affect toilets and drains. Many of these common issues have equally common solutions

Main Types of Plumbing Pipes Used in Homes

Whether hiring a plumber or taking on a do-it-yourself plumbing project, the experience can be confusing because of the choice of several types of plumbing pipes. Eventually, pipes’ uses tend to blend together. Which type of pipe should be used for water supply, drainage, sewer, and even for the exterior? The answer is not as clear as it may have been in the past when the main pipes of choice were galvanized steel or cast-iron.

PEX Pipe

PEX, or cross-linked polyethylene, pipe is one of the newest and most popular pipes to hit the plumbing market. PEX is used only to supply water. PEX is a pipe that is rigid enough to withstand the pressures of water supply but flexible enough to weave throughout walls, ceilings, basements, and crawlspaces. PEX has truly delivered water-supply plumbing into the hands of do-it-yourselfers and professional plumbers.

PVC Pipe

PVC, or polyvinyl chloride, pipe is a drain or vent line type of plumbing pipe. PVC initially gained popularity because it was lighter and easier to work with than traditional galvanized steel pipe. PVC pipe is moderately easy to install and requires little more than a hacksaw and a miter box to cut. PVC glues together with solvents

Rigid Copper Pipe

Rigid copper is often used for water supply lines within the home. Rigid copper is easily cut with a hacksaw or with a special copper tube cutter. The connection is a different matter, as it requires a practiced hand to solder copper pipe together. Rigid copper pipe is great for water supply because it does not come with any health risks.

ABS Pipe

ABS (acrylonitrile butadiene styrene) pipe is mainly used as a vent and drain line. ABS pipe looks very much like PVC pipe, except that it is black and slightly softer.

Choosing The Perfect Residential Electrical Remodel Company For All Electrical Needs

Things for Your Electrical and Lighting Plan

After giving a general overview last week of what’s needed for the specifications for the plumbing, mechanical and electrical subs, I thought it would be helpful to go into more detail about the lighting and electrical plan that you will have to give to the electrician.  There is so much to consider.  I’ll give you a list of 50 suggestions that you can use as a checklist to help you develop a pretty complete electrical and lighting plan before you even meet your builder or electrician for the lighting walkthrough. 

The lighting walkthrough typically happens in the rough-in stage, after framing is complete and before the drywall goes up.  Usually the homeowner will walk through the framed house with the electrician and/or builder and discuss where fixtures, outlets and light switches will go. 

But thinking through the electrical and lighting plan well before you do the electrical walkthrough will allow you more time to consider exactly what features and outlets we want, and where. This decreases the chances of you forgetting an outlet or light switch somewhere.  It will also give you an opportunity to develop more detailed specifications so you can get more accurate electrical bids before construction even begins.    You may want to do a walkthrough by yourself a time or two when developing your lighting plan, just so you can get your thoughts together and not feel rushed when you do the official walk through with the electrician and/or builder

It’s probably best to make a written, room by room list of fixtures and features plus mark your house plan where the electrical fixtures, outlets and light switches will go.  You can use different colored dots or symbols for light switches, outlets, recessed can lights, under cabinet lighting, and lighting fixtures, such as wall scones, table lamps, floor lamps and chandeliers.  For example, you might symbolize all recessed can lights with black dots and light switches with red dots. Outlets could be blue and lighting fixtures could be green.  If you really want to be helpful (and a little Type A), after you figure out what exact lighting fixtures you want to go in each room, you paste a photo of the fixture to a paper copy of your house plan.  Paste each lighting fixture photo on the diagram of the room where it will go. That will serve as a master guide for your electrician when he installs your fixtures toward the end of the build.

Now about these electrical and lighting plan suggestions… most likely, not all of the suggestions will work for your family, house and lifestyle.  Use what works for you and leave the rest.  And keep in mind, these tips should go to into your preliminary lighting/electrical plan. You’ll want to go over the preliminary electrical plan and marked up house plan with your electrician and/or builder to see if they have any additional suggestions that would make your lighting plan more functional or more economical. 

NEED ELECTRICAL REMODELING? KNOW THESE

Everyone experiences a need for electrical remodeling at some point. Needs change within homes and businesses, and electrical work often has to change as well. Your home or office may need to be updated to comply with electrical codes, outlets may need to be added or moved, expansions and renovations could call for rewiring, or modern appliances may require a different kind of electrical supply. Regardless of the need for electrical remodeling, one thing is for certain: it’s a delicate process that needs to be done right. This project requires a lot of skill and experience to prevent costly, inconvenient, or even dangerous or fatal problems from occurring. It’s essential to be able to trust anyone who touches your electrical wiring to keep you and your home or business safe

The Importance of Expert Electrical Work

Like it or not, electrical work is not a DIY project. We live in an age of people commonly thinking they’re an expert on subjects they have little experience in, mostly due to the availability of knowledge through online articles and videos providing tutorials on just about everything. This, combined with many homeowners wanting to save money, ends up inspiring people to take repair jobs around the home into their own hands. However, there’s a lot going on behind your home or business’s walls and above the ceiling that you never see. Attempting to enter this world of electrical wiring and manipulate it yourself can result in some pretty unpleasant, even fatal, outcomes.

It’s important you know these things before attempting any electrical remodeling work on your own:

You could cause a fire quickly. It’s no secret that electricity has the very real ability to cause major fires. Electrical fires often begin out of sight, and before you know it, could ravage the structure of your home or office and put you and others in danger very quickly.

Inexperience can be fatal. In the battle of electricity versus humans, electricity will always win if you don’t know how to work with it. Messing with electricity when you don’t have the official knowledge and skill to do so can result in an error that causes electrocution. This could lead to paralysis, loss of nerve or neurological functioning, organ damage, and even death, which is why electricity is nothing to play with.

You might break the law. Every state has building codes and strict specifications and regulations on electrical work. Without detailed knowledge of these codes, you could perform work that renders your home or business not up to code, which could lead to fines or legal issues. That’s why it’s best to leave it to a professional who is required to be up to date on these regulations and knows exactly how to work within them.

It could get expensive. When you don’t fully know what you’re doing with electrical wiring, you run the risk of making a mistake that interrupts or shuts down electricity to outlets, whole rooms, or even your entire home. Attempting to fix the mistake can result in more damage and danger, which is why it’s recommended to let an expert handle the job so it’s performed correctly from the start, sparing you the time and money it will cost to fix the damage before the remodeling.

Experience-Backed Electricians

When you need electrical remodeling, call on the pros. Electrical work is no simple project. It requires skill to be done safely and correctly, ensuring you and your home or business get through the remodel without hassle or injury. If you need electrical remodeling in the Raleigh, Clayton, or Wilmington areas, contact CMC Electric. We’ve been a preferred electrician in the area for years thanks to our reliability and reputation of doing the job right the first time. Our team is highly experienced and trained, and we provide firm, upfront cost quotes so you don’t have to worry about surprises later on

Things to Know About Electrics When Building a New Home

Building a new home can be incredibly exciting. But many people find that they get so consumed by the design and project management aspects of their new home that crucial elements, such as its electrical requirements, can be overlooked. If you get these wrong, the consequences facing your home can range from mere inconvenience, right through to major health and safety risks.

PLAN THE LOCATION OF OUTLETS

While you may be thinking of how rooms will be coordinated and where features will be situated, it’s necessary to first determine the position of electrical outlets and wiring for your communication devices. This is so you can then place electrical equipment in the appropriate places with connection to electricity. Consultation with a qualified and experienced master electrician can help you to achieve this end.

UNDERSTAND THE WIRING SYSTEM YOU’LL NEED

In making decisions about the electrics you’ll need in your new home, it’s important to realise that your total electrical system is comprised of the electrical service, as well as lighting outlets and a range of appliances that are hardwired. It’s worthwhile noting that your electrical service needs to be of a sufficient size to match the needs of the people living in your house. Typically, one hundred to two hundred amps are adequate for a standard-sized house and household.

KNOW IF YOU NEED EXTRA POWER

In this day and age, where technology is incredibly advanced, a number of people choose to have large systems for audio, visual, and entertainment purposes, as well as home-based offices. If you’re such a person, it’s wise to find out more about the options available for your home’s electrical system. It may be necessary for you to have an advanced wiring system in your home.

CONSIDER ENERGY EFFICIENCY

When it comes to electricity, many of us are concerned about the rising costs and negative environmental effects. Many people building new homes therefore appreciate knowing that a control system can be used to moderate the costs of energy. Such systems can be remotely controlled from your home, and while this capability may seem futuristic, they can ultimately save you money and ensure that your home is safe when you’re not there.

Lighting and Electrical Considerations for Vancouver Home Renovation

There are many things to learn whenever you renovate your house. Our decisions are incredibly crucial to making sure we can enjoy living in our homes. Electricity is an essential element in everyone’s home these days. Making bad electrical choices is something one cannot afford.

Having an experienced electrician by your side when planning for your home renovation would be a great idea for saving time and money. You will easily be able to avoid future regrets by making these important changes.

Never Over light

Overlighting the interiors is one of the most commonly made mistakes you will find in most home renovations.

Mix it Up

Using conventional lighting options and techniques time after time is one of the biggest reasons why most people are never satisfied with their lighting. This reason is why we suggest you mix it up and give your house a new look simply by changing the way you light it.

Do Not Use Outdated Lighting

Using outdated lighting inside your residence is a surefire way to make it look bad. Although illumination is a primary purpose of every light, there is much more to it than that.

Upgrading Your Property’s Electrical Components

Remodeling and renovation projects often require the services of an electrician. Due to the inherent dangers of working with electricity, this is not a job for you to tackle on your own. We provides electrical services for remodeling and renovation projects.

Wiring for Home Remodeling

Are you adding a bathroom, new room addition, enlarging the kitchen, or adding a new wall to your home? In these situations, new wiring is needed to provide electricity to the new space. We can make the changes to your electrical system that are needed to deliver power where you need it. Our experienced Wake Forest electricians will provide the new electrical components, install panels upgrades, and ensure that everything is installed safely.

Upgrades for Home Renovation

Often, the wiring in older homes does not meet current safety standards. People are often unaware of the potential risks caused by outdated electrical system components. A home renovation project provides the opportunity to upgrade the wiring system in your home. We can show you how to improve the safety of your electrical system.

Electrical remodeling is important for ensuring the optimal functioning of your home when it comes to electricity and using electrical appliances or devices. Do you notice your home’s electrical bulbs dying out sooner than they should be? This could be a sign that your home is in need of electrical remodeling. With electrical remodeling, your home’s light systems will function better and will last you longer. Electrical remodeling is also important for preventing power surges that could lead to costly damages to your home appliances and devices. Electrical remodeling for your home can be a tricky and dangerous task for homeowners to complete on their own. If you are looking to remodel and renovate electrical work in your home, it is important to consult an electric professional. Did you know that there are over 51,000 electrical home fires that occur alone each year, due to such occurrences?

Home Inspection Are For The Wise

How to Choose a Home Inspector

Would you call a retail store and ask “How much do you charge for a TV?” Probably not. You’d have to do research and decide what you want to buy before asking for prices.

Home buyers often ask me this because they’re trying to find the inspector that offers the best deal. When buyers are only concerned with the price of a home inspection, they have already made an assumption that all home inspectors offer the same thing, and they assume they’re comparing apples to apples. This just isn’t true.

When reviewing a sample report, there is much more to look for than just photos and illustrations. Watch out for useless report writing that is designed to cover the home inspector’s butt, not yours. A bad report would contain a lot of phrases like “This was observed, recommend further evaluation and correction by a licensed blah blah blah”.  With this type of writing, you could easily have an inspection report that recommends a dozen additional inspections.   If further inspections are needed, that’s fine, but these recommendations should never be made lightly, because additional inspections require more time and money.

When I first started inspecting, I was told by a home inspection instructor that this was the best way to write a report. As I’ve written more and more reports over the years, I’ve come to realize that home inspection schools teach this style only to protect the inspector. This doesn’t provide a service for the client.  A good home inspection report will clearly state the problem, explain the significance of the problem if it’s not obvious, and will give a recommended course of action.

When picking out a home inspector, spend some time researching inspectors, even if you receive three different names of inspectors from your real estate agent. Many agents give out three names because they don’t want to assume liability if their client isn’t happy with the inspection, not because they have three companies that do great work. For more tips on finding an inspector online

HOW TO CHOOSE A GOOD HOME INSPECTOR?

Choosing the right home inspector is almost as important as choosing the right house. A good home inspector will provide you with an invaluable amount of information about the house you are interested in buying. With this information, you can decide if you want to continue with the purchase of the home or look for a different house that better suits your needs.

Education

Not all home inspectors have the same background and training. When speaking to an inspector, don’t be afraid to ask them about their training and education. A good home inspector should have extensive training on all the systems and components in a house. Continuing education is also important. Home inspectors should complete continuing education courses regularly to stay on top of new policies and regulations.

Certifications

Home inspectors can complete a number of different certifications to expand their knowledge and better serve their clients. Some common certifications include infrared, pest and termite, and indoor air quality (mold).

Experience

Experience is an important part of being a good home inspector. You can gauge an inspectors experience by asking them how many inspections they have completed or how long they have been a home inspector. If you are dealing with a specific problem like Chinese drywall, ask the inspector if they have experience dealing with these types of issues. An experienced inspector will be able to provide more insight which will help you decide if the problem is a deal breaker or not.

Client Reviews

Other people’s experience with a specific home inspector can help you determine if they are a good home inspector or not. You can usually find the inspector’s reviews by visiting their google listing, yelp page, or facebook page. When looking at reviews, consider the number of reviews and the overall rating.

How to choose a home inspector

top-notch home inspector discovers and helps you understand your properties’ strengths, limitations, and liabilities. With an inspector’s assessment, it’s easier to decide whether a property is worth buying, or when you’re selling, to prepare for any potential objections buyers might have.

“Based on the size and scope of the property, you want someone with experience in similar properties so you’re getting what you really need,” he says. So if you have a 100-unit apartment building and you’re talking to an inspector who usually inspects smaller buildings or single-family homes, he or she probably isn’t the best fit.

Additionally, Quint explains that inspectors with a background in architecture or engineering will have more construction knowledge and an understanding of the structures and systems they evaluate. Those with real estate management experience will, too, and they’re usually well-versed in the ins and outs of proper building maintenance.

When you find an inspector that’s a good fit for your property, ask what services they provide. Most can do basic inspections, but you may need more specialized services, such as evaluation of environmental issues or thermal imaging to detect electrical hot spots. Look for inspectors who have the right expertise or partner with qualified specialists. And finally, before you make a decision, ask them for a sample report from a property that’s similar to yours.

Compliance with Americans with Disabilities Act (ADA) — A potential buyer may want to know if any units or the building itself accommodates tenants with disabilities, including wheelchair accessibility

How to Choose the Best Home Inspection Company

Moving into a new home is like a dream come true. The level of excitement and enthusiasm that you have is hard to define. Now imagine inspecting a problem in the AC unit on your first day in your new home. Thanks to a faulty component in the AC, you’ll have to deal with insane heat in your home.

How to Find a Trustworthy Home Inspector

A home inspector will be evaluating the property that you’re interested in buying and it is important that you choose one who is reliable and trustworthy so that you can rest assured that your home inspection is carried out thoroughly. Here are a few tips on how to choose the best home inspection company in Tallahassee or other areas.

Ask for the Experience and Certificate of the Home Inspector

It is important to hire a person who has adequate knowledge and experience about home inspections. Since many states require home inspectors to be licensed, it is even better if you hire someone who has proper training and does this job full-time at a professional organization.

Ask Your Real-Estate Agent for a Reference

If you are buying a house through a real estate agent, it is convenient for you to hire a home inspector. All you have to do is to ask your agent to refer you to a trustworthy inspector and your work will be done. The reason we are encouraging you to talk to your agent is because most real estate agents interact with home inspectors on a regular basis. They know who the experts are and they are motivated to connect you with the most experienced professional.

Relevant Reports

Before hiring a company for your potential home to be inspected, you should ask them to show you sample reports so that you have an idea of the extent to which the home inspector will vet the house.

How to Avoid Hiring a Bad Home Inspector

Hiring an unqualified home inspector can be disastrous for you as the buyer. It could even lead to the seller canceling the transaction. There are steps you can take to ensure you are working with inspectors who are professionally qualified. These steps can include asking for credentials at the outset and reviewing a home inspection report they have created for another buyer.

Ask for Credentials and Qualifications

Choose a certified inspector. There is no shortage of home inspector associations. One of the best known and oldest organizations is the American Society of Home Inspectors. You can also ask friends for referrals or ask your real estate agent for a recommendation, but in either case, research the inspector’s qualifications.

Review a Sample Home Inspection Report

A good home inspector should agree to send you a sample report. If the assessment is only a few pages long, don’t hire that person. While report lengths may vary, comprehensive inspection reports average between 20 and 50 pages and should contain color photographs highlighting defects or problems.

Avoid Inspectors Who Recommend Contractors or Perform Repairs

Home inspectors are in the business of inspecting homes. If a home inspector offers to direct you to a contractor to work on repairs, that inspector could be creating a conflict of interest. If a home inspector takes it upon himself to recommend repairs, liability issues may ensue.

The Length of Your Home Inspection

Most home inspections take between two and three hours, and sometimes longer. During the inspection, the inspector will climb into the attic, crawl under the home or check out the basement, climb onto the roof, and should open every closet door in your home. They will check cabinets under sinks and the intakes of air conditioning units.