Low Cost Water Heaters Efficiency Upgrades

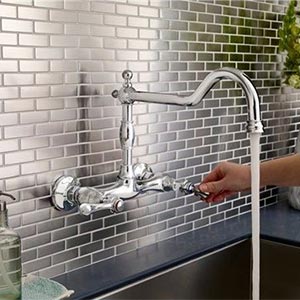
Smart water heating could help

energy crisis has many dimensions, from political and economic to technical and environmental. Recently, the country’s power utility, Eskom, has been generating only about 60% of its capacity and has had to restrict usage to prevent a regional blackout

new chief executive officer has affirmed the importance of demand management to handle the crisis. But his approach of merely “subsidising energy-efficient lightbulbs” won’t cut it. The country needs drastic interventions – and the elements of the fourth industrial revolution are available to make this possible. These are: wireless connectivity, the internet of things, big data analysis, machine learning, artificial intelligence and intelligent centralised control.

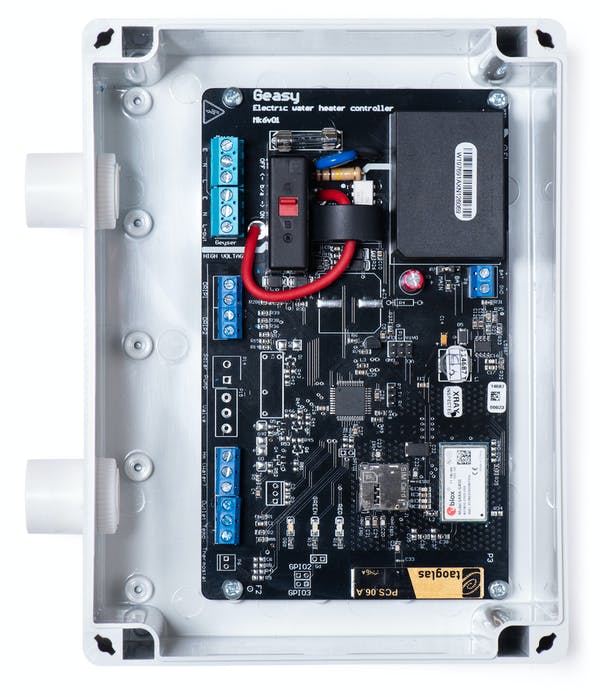
What tends to be overlooked is that these water heaters are perfect for storing thermal energy. They absorb electrical energy when heating water, and discharge thermal energy later when the hot water is used, with little loss in between. This makes them well suited for flattening the grid’s morning and evening demand peaks. Centrally switching them on during off-peak times would distribute demand for electricity more evenly through the day.

The benefits of scheduling heaters don’t stop there though. Our research has shown that the energy they guzzle, and the resulting emissions, can be significantly reduced too by applying optimal scheduling

Two thorny issues compete with demand and energy management in water heating. One is customer satisfaction. The most energy-efficient and demand-optimal water heater is one that is never turned on, but who wants a cold shower?

Gas vs. Electric Water Heaters: Which Is More Energy-Efficient?

Other than equipment costs, you might not have thought too much about selecting a water heater. But, to get hot-water heater energy savings, there are some factors to consider before you purchase. For example, what size water heater do you need? What types of hot-water heaters are there? And how should water heater energy use be factored into your decision-making?

Understanding water heater energy usage

Most of us turn on the faucet and don’t pay much attention to how the hot water arrives — until, of course, it doesn’t. We tend to take the hot-water heater in our homes for granted.

But ignoring your hot-water heater might mean passing up an opportunity to gain some hot-water heater energy savings. Water heater energy usage makes up about 18% of the average utility bill, after all. You can find hot-water heater energy savings a few different ways. But knowing how to choose a hot-water heater that’s energy-efficient from the beginning is the best way to lower your energy costs from the first time that heater kicks on.

How to choose a hot-water heater

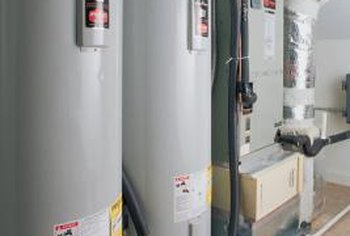
First, some basics for selecting a water heater. A single-family tank water heater has a reservoir of hot water ranging from 20 to 80 gallons. When someone turns on the hot-water faucet, the hot water is released from the top of the tank and piped to where it’s needed in the house. The hot water in the tank is replaced with cold water entering the bottom of the tank to ensure the tank is always full.

Determine the type of fuel source in your home.

The fuel source that powers your home can help you decide which type of hot-water heater to get. Although some homes are fitted for natural gas, 1 in 4 U.S. homes is all electric. Additionally, those living in rural areas may have difficulty accessing natural gas. If your home is limited to just electricity, the choice between an electric vs. gas water heater has been made for you unless you’re willing and able to put in a gas line.

Water heater repair

Water heaters are a tricky business. Water heater tech’s do not always require the same technical training or licensing as plumbers and other contractors. It is also sometimes difficult to distinguish between a company simply on the hunt to sell water heaters instead of repair them. It is important to carefully select a water heater repair service for your home needs.

Here are things to consider before you hire a water heater repair service:

Avoid Door-to-Door Representatives – You get a knock at the door, and someone wearing a uniform tells you they need to check your water heater. If you let them, they will likely tell you the water heater is old and inefficient and should be replaced, even if that’s not true. You should not invite door-to-door salesmen into your home; there are much better ways to find a reliable water heater repair company.

Reputation – The internet allows you to easily find out which water heater repair companies have the best reputations. By checking water heater repair services out online, you are able to access customer reviews and ratings. It is advisable to check with the Better Business Bureau for complaints, as well.

Certification – While they do not require the same amount of technical training as other contractors, water heater repair service technicians still require certification. It is important to check their certification before allowing them to repair or replace your water heater.

Experience – Experience is extremely important when it comes to water heater repair. Generally, the more experienced the technician, the higher the quality of the work.

Price – At the end of the day, price is always a deciding factor. However, it shouldn’t be the only factor—you should be very wary of a company that gives you an estimate that seems too good to be true.  You will probably end up paying more in the long run to fix their poor-quality work or to repair or replace the water heater again just a few short months or years later.

Off Grid Water Heater: The Ultimate Guide

When building an off grid lifestyle, there are comforts of modern day living that we just do not want to give up. On-demand hot water is one of the fundamentals that we have grown accustomed to; we feel it is a necessity for life as we know it.

Not too long ago in humanity’s history, hot water was a nicety that was only used for cooking and for the occasional bath. If you wanted a hot bath, you would have to boil water and pour it into a washbasin. I could only imagine how many kids were doused in a tub of cold water!

My appreciation for hot water began when I moved into a camper full-time. We were on a 6-gallon hot water heater which allowed for maybe 5 minutes of hot water. I had grown accustomed to 30 minute luxurious steamy showers where I could daydream and shave my legs at my leisure.

This really got me thinking about how we can manage to have continuous hot water in an off grid scenario. As you know me by now, I have spent hours of research building this very article to provide you with the best ways you can build an off grid water heater system so you can enjoy modern day living without being connected to a municipal water and heating source.

The Methodology of an Off Grid Water Heater

The essence of being off grid is to be independent from municipal sources. Being free from monthly utility bills and providing your home with your own energy is the foundation of living the off grid lifestyle. There are two commodities that you will need for your off grid water heater: energy for heat and water.

How Much Does It Cost To Repair A Water Heater?

Hot Water Heater Repair Cost

The national average cost to repair a water heater is $573. The typical range for repairs is $217 and $931, though homeowners have spent as little as $100 and as much as $1,300.

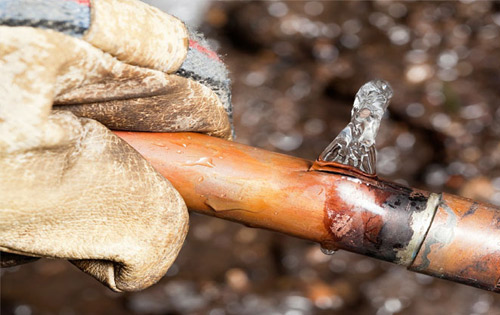
There is nothing worse than waking up on a frigid winter morning to a cold shower because the water heater that is on the fritz, or worse, has completely died! Conventional water heaters are relatively simple and straightforward in the way that they operate, so there are only a few things that can malfunction. Cold water enters the tank and is heated by an electric element or gas burner. As the water heats, pressure builds inside the tank. When you turn on a tap, pressure sends hot water out of the faucet. Problems could be as simple as a pilot light that has gone out, a circuit breaker that has tripped, or a thermostat that is broken. The average thermostat replacement cost is between $100 and $300. Most other repairs are equally affordable.

There are two main types: gas and electric. A gas unit works by way of a gas flame while an electric one works using electric elements, or coils. The two types have similar life spans and repair costs. A gas one will cost more to install and replace, though it won’t use as much energy over time as an electric unit. Here are a few things to consider when faced with the cost of repairing or replacing your water heater.

Gas Water Heater Repairs

Gas models will have issues that are unique to their power source. The three most frequent problems are with the pilot light, the thermocouple, and the gas control valve. To figure out the root of your problem, a professional will need to troubleshoot each element as they go. Plumbers charge $45 to $150 per hour and the most common issues with gas units cost between $150 and $500 to fix. Some of these repairs can be done without a professional, but only if you follow instructions and secure your gas line. Before you relight a pilot light or perform repairs on your own, make sure that you are comfortable working with gas and that there aren’t strong gas smells around your unit. If there is a strong gas odor, call a professional and address the problem as soon as possible.

Pilot Light Assessment and Reignition Cost

One of the most common problems with gas units is the pilot light going out. There may be no need for repairs, if this is the case. It could be that it was blown out or that your unit temporarily lost its gas connection. If you follow safe procedures, you can relight this component on your own. This would save you a service call fee, which could range from $45 to $150 per hour. If it doesn’t light, you could have thermocouple or valve issues.

Why You Need To Repair Broken Pipes Immediately

How to Keep Pipes From Freezing

As a general rule, the “temperature alert threshold” for freezing pipes is about 20 degrees Fahrenheit. This temperature was determined by researchers at the Building Research Council at the University of Illinois, who determined that uninsulated water pipes began freezing when the temperatures outside dropped to 20 degrees or below.

However, this is not a hard-set rule. Depending on their exposure to wind and the elements, pipes can freeze when temperatures are higher than 20 degrees. In interior spaces, if pipes are near cracks or openings that let in cold air, they may develop ice blockages even if they are in a heated space.

To keep your pipes from freezing and bursting, make sure they are not exposed to temperatures approaching the alert threshold of 20 degrees.

What to Do If Your Pipes Freeze

If your pipes are frozen, you can take steps to reduce potential damage and help melt the ice blockages — but not every cold snap will mean frozen and blocked pipes. Look for these signs to check if your water system is truly frozen:

  • Frosty pipes: If a section of your piping system is exposed, check to see if any frost has developed on the surface. If it has, there is a good chance your pipe is frozen.
  • Unusual smells: Strange and odorous smells coming up from a drain or faucet could indicate a frozen pipe. If your pipes are blocked by ice, the smells have nowhere to escape except back in the direction of your home.
  • No water: One of the most obvious signs that a pipe has frozen is a lack of running water. If you turn on a faucet and nothing or only a small trickle of water comes out, this probably indicates that the pipe has an ice block.

Once you’ve determined your pipes have frozen, you can take steps to thaw them out. However, take care when trying to unfreeze any pipes — if one of them has burst, thawing them out could cause a flood. For broken pipes, the best course of action is to turn off your water at the main shutoff valve and consult with an experienced plumber. They can resolve the problem before spring temperatures unfreeze the pipes and flood your home.

If your pipes aren’t ruptured, you can take the following steps to unfreeze them and restore running water to your home:

  1. First, turn on the faucet. As the ice plug in your pipe begins to melt, you want the water to be able to flow through the pipe. The running water will help melt the rest of the ice.
  2. Apply heat to the frozen portion of the pipe. If you can access the portion of pipe that has ice, you can begin thawing it by directly applying heat. Wrap an electric heating pad around the section of pipe, or use a portable space heater or an electric hair dryer.
  3. Keep applying heat until the full water pressure is restored. Check all other faucets in your home to see if any other pipes show signs of freezing — if one pipe has frozen, it’s likely that others have as well.

If you aren’t able to locate the frozen section of pipe, call a licensed plumber to help.

Precautions You Can Take To Prevent Your Water Pipes Bursting:

There are no practical ways of heating the ground temperature around your home, so stopping the contraction caused by the cold water is not something you can control. Our advice is to be mindful of your plumbing system as the temperatures change and check to see if you have any leaks. While we can’t stop the leaks caused by temperature drops, there are things you can do to prevent pipes from freezing and bursting. Here is a list of eight things that you can do to avoid water pipe bursts:

1. Keep Water Faucets Running

If it is extremely cold outside, always keep one or two faucets running slowly. Water moving through the system should prevent the line from freezing.

2. Direct Warm Air To Cold Areas Of Your Home

Often, the pipes that freeze are located near an outside wall or a window, so be sure to direct warm air to any colder areas of your home. (Start in your basement and look for any pipes near the exterior of the home).

3. Leave Your Cabinet Doors Open

If your kitchen sink is on an outside wall (as it usually is), be sure to leave cabinet doors open to allow warm air into the cabinet. Your kitchen faucet is usually to leave on during extremely cold weather.

4. Disconnect Your Hose From The Outside Faucet

Be sure to disconnect your hose from the outside faucet. If you leave your hose connected, water is not able to drain out of your hose bib and will freeze and break the device.

5. Install Heat Tape

There is a product called heat tape that can be installed and will warm pipes as needed during cold weather. While you could do this yourself, you may want to consult with an Indianapolis plumber to learn some best practices.

6. Seal Leaks That Allow Cold Air Into Your Home

Seal leaks that allow cold air into your home where pipes are located. Look for air leaks around electrical wiring, dryer vents, and pipes. Use caulk or insulation to keep the cold out. With severe cold, even a tiny opening can let in enough cold air to cause a pipe to freeze.

7. Check Your Home’s Temperature

Prevent temperatures from dropping below 32 degrees in any area of your home where water lines are located.

Not Just for Cold Climates

It is a common misconception that frozen pipes are an issue only for homes in typically cold climates. However, the homes that are actually more vulnerable to frozen pipes are those in typically warmer climates because the pipes may not be properly insulated against frigid temperatures, or they may be located in unprotected areas (or even outdoors). Abnormally cold weather puts these pipes at risk.

Wherever you live, you need to worry only about the water supply pipes, not the drain pipes. Water pipes are small, only about 1 inch in diameter or smaller. Drain pipes are 1 1/2 inches and larger and are usually made of plastic. Drain pipes carry waste water, but they do not hold water and are not pressurized like water pipes, so freezing inside drains is not a concern.

Adjust your habits

One common scenario in which pipes freeze is when people go on vacation and turn off the heat, which causes the temperature inside the house to drop significantly. Thus, “in an unoccupied house we recommend keeping your home above at least 60 degrees,” Mccan says.

Other rules to follow:

  • Keep interior doors open (this allows the heat to circulate throughout your home more efficiently).
  • If you have ceiling fans, “flip the switch in reverse to draw the air down and warm the room,” Mccan says.
  • Keep garage doors shut, especially if there are water lines in the garage (which tends be colder than other areas of the house).
  • Close outdoor vents, such as in attics or crawlspaces, to prevent cold exterior air from penetrating your home.
  • Disconnect all outside water hoses and let cold water trickle out of faucets in unheated areas or where pipes run on an exterior wall, as this can help relieve any pressure building from ice inside a pipe.

Install water alarms

Like smoke detectors, water sensors can be a godsend during an emergency. These devices detect leaks before costly water damage occurs, which can save you hundreds if not thousands of dollars in repairs. They can also detect moisture before mold can grow. Mccan advises placing water alarms strategically throughout your home in areas that are at risk of water damage — under sinks, behind toilets, near water heaters, refrigerators or dishwashers, next to washing machines, and close to air conditioner drain tubes.

Protect Your Pipes:

We all know water expands as it freezes. If water inside your pipes freezes, it will expand, too, which can cause your pipes to crack and burst. Pipes also can burst when pressure builds up behind a chunk of ice, which is why it’s a good idea to leave faucets dripping in very cold weather. Either way, a burst pipe can cause massive damage. Take a few steps to winterize your pipes and avoid a potentially catastrophic claim

  • Drain water from outdoor faucets and sprinkler systems to keep those pipes from freezing.
  • Disconnect and store outdoor hoses; cover outdoor faucets with foam insulators.
  • Protect water pipes that run through unheated areas of your home with insulation, such as the attic, basement, or garage.

Pro Tip: Know where your water shutoff valve is so that you can turn off the water in case of an emergency. Typically it’s located in the basement or buried near the road.

Check the Heat:

The time to be sure you’re going to stay warm all winter is before the weather gets too cold. Check your furnace by turning on the heat and the blower to be sure they’re operating as they should.

  • Change your furnace filter at the start of the season and then every two to four months. Filters get dirty much more quickly if your home is dusty or if you have furry or feathery pets. Clogged or dirty filters are less efficient, which means your home might not warm up properly.
  • Consider installing a programmable thermostat if you don’t have one. Programming it to be cooler at night and when you’re not at home will save you money, and you can program it to be warmer for when you return or get up on cold winter mornings.

Pro Tip: Reverse the direction of your ceiling fans. Everybody thinks of using fans in the summer, but they can help you stay warm in winter too. Set the blades to turn clockwise to circulate warm air from the ceiling down into the room.

The Waterless Toilet Installation

Tips for Choosing a New Toilet

The traditional gravity-flush toilet is pretty trouble-free plumbing fixtures, thanks in part to the fact that it has no high-tech parts. Although the water-supply valves, flush valves, and wax ring that seals the toilet to the floor all may fail and need to be replaced from time to time, the porcelain or china fixture itself can last for decades in perfect operating shape unless the bowl or tank become cracked. Nevertheless, you may want to replace your toilet, either for purely aesthetic reasons, such as when remodeling a bathroom or to take advantage of new water-saving features available on modern toilet designs.

Taking Measurements

The first step is to measure carefully to ensure that the toilet you purchase will fit in the same location as the old one. Measuring is done with the old toilet still in place.

Start by measuring from the wall behind the toilet to the center of the bolts at the base of the toilet. If your existing toilet has four bolts, measure to the center of the back bolts. This measurement is known as the rough-in measurement. For a standard toilet, the rough-in measurement should be between 11 inches and 13 inches. Keep this measurement handy when you go to purchase the replacement toilet.

Toilet Type

The first option is between one-piece and two-piece models. With one-piece toilets, the tank and bowl are all one integral unit. These toilets look very sleek and have a low-profile, but they are generally more costly than the typical two-piece toilets. Since two-piece toilets are more common, they are also more competitively priced.

Bowl Shape

When choosing a toilet, you can choose from those with bowls that are elongated, compact -elongated, or round-front. Elongated toilets offer deeper seating areas and will fit most residential applications. Compact-elongated toilets have a slightly shorter footprint and take up less space while still offering good comfort. Round-front toilets take up the least space and are a good choice where space is at a premium.

Choosing a Toilet: Tips to Ensure You Get the Right Fit and Flush

Choosing a toilet used to be a simple matter of finding a design that suited you. Today, though, you’ll need to choose among different mounting types, flushing methods, bowl shapes and other options. Each option has its pros and cons, and what’s right for you depends on your individual needs. Before you start browsing for a new toilet for your Southwest Florida home, get clear on your choices so you can select the model that’s best for you.

Measure for fit

Your first step in choosing a toilet is to find your current toilet’s rough-in measurement so you can find a model that fits your bathroom. The rough-in measurement is the distance from the wall to the middle of the toilet flange, which lines up with the center of the hold-down bolts. For a toilet with two bolts on each side, measure to the center of the back bolt. If you’re measuring from the lowest part of the wall, take the thickness of the baseboard or molding into account. Ideally, measure directly from the wall.

The standard distance is 12 inches, but most toilet designs can accommodate a distance of 11 to 13 inches. Any more or less than that, and you’ll need a toilet designed specifically for this distance. That will most likely be a 10- or 14-inch rough-in model.

Choose your design

When choosing a toilet, you’ll need to decide if you want a one-piece, two-piece or wall-mount design. Two-piece toilets are the most common. These plumbing fixtures have a separate bowl and tank you can buy together or separately. Because there are so many on the market, opting for a two-piece toilet gives you a greater chance of finding one with the features you want

Decide on bowl type

Toilet bowls are available in two shapes: elongated and round. Elongated bowls are around 2 or 3 inches longer in the front than round bowls. Round bowls never surpass 28 inches, while elongated bowls can be as large as 31 inches. Despite the fact that they take up more space, elongated bowls offer some advantages. Some individuals, including the elderly and those with physical impairments, may find the bigger seat more comfortable because it supports the thighs like a chair. These bowls also retain less soiling and hold back odors better. For some, the streamlined oval shape is more visually appealing than the traditional round shape.

Choose the Right Toilet for Your Bathroom

Is there really much to think about other than looks when selecting a toilet for a bathroom remodel? Surprisingly, yes. When it comes to choosing a commode, size, height and how well it functions should play into your decision.

THE PERFECT FIT

There are thousands of toilets on the market, but a rough-in distance, which measures the distance from the finished wall to the center of the sewer drain for the toilet, will narrow the field. The standard rough-in is 12 inches, and the widest selection of toilets is available in this size. If a bathroom remodel makes use of an existing rough-in that is another size, 10 or 14 inches for example, choices can be more limited.

Comfort also comes into play with toilet heights. Many manufacturers now offer toilets that measure a few inches taller than standard 14″ fixtures. “For taller people … it’s more comfortable,” says Suzie Williford, National Kitchen & Bath Association vice president and manager of luxury products at Kiva Kitchen & Bath in Houston, Texas. Taller toilets are also an integral part of universal design, which makes a bathroom accessible to all users regardless of mobility, because they make sitting down and standing up easier.

WHAT STYLE?

There are several toilet types available. A two-piece toilet, in which the tank bolts on top of the bowl, is typically a bit more affordable. A one-piece toilet, with an integral tank and bowl, can cost more, but these units are easier to clean because they have no seam. Wall-mounted toilets add drama to a bathroom, and cleaning under them is a breeze. However, this higher-end fixture can be more expensive to install because it requires a thicker wall to mount the toilet and house the tank, and future maintenance could require reopening the wall.

FLUSHING TECHNOLOGY

Once you’ve settled on the size, shape and style, find a toilet that flushes efficiently. “You can have the most beautiful toilet in the whole wide world, but if it doesn’t flush, it’s ugly,” Williford says.

Things to Consider When Choosing a Toilet

Fortunately, today’s Bath market offers something for everyone. Whether you’re seeking a modern or traditional, one-piece or two-piece, or white or colored toilet, you’re sure to find one that suits your needs. Not sure where to begin? Let our guide walk you through the basics of selecting a toilet!

Measure the Rough-in

In plumbing terms, a “rough-in” is the distance from the wall behind the toilet to the bolt cap of your toilet. Toilets typically have a 10”, 12” or 14” rough-in. This distance determines the type of toilet your plumber can install.

Choose a Toilet Style and Type

Toilets come in a wide range of styles, including traditional, transitional, modern, eclectic and contemporary. Once you know what you’re looking for in a style, you can then consider the type of toilet of that best suits your needs.

Two-piece Toilets consist of two units: a bowl and a tank that is bolted on top. Depending on the model, you may be able to mix and match your bowl and tank. If you are interchanging your tank and bowl, make sure the tank securely lines up with your bowl’s bolt holes. Two-piece toilets work well with a variety of styles.

One-piece Toilets seamlessly integrate the toilet and the bowl as one unit. This creates a sleek, clean look that’s perfect for a modern or contemporary bathroom. One-piece toilets are easier to clean and install than two-piece toilets. One-piece toilets are typically found in modern, contemporary and eclectic bathrooms due to their sleek appearance.

TIPS TO HELP YOU CHOOSE A TOILET

Check the plumbing

Your existing bathroom will have plumbing that’s set up for your specific layout. This and the size of your space will narrow down which toilets you can use. However, if you want to change the plumbing to suit the toilet you really want, talk to a plumber so you can assess if the additional cost is worth it.

Determine your pan type

Australia has three common pan types: S-trap, P-trap and Skew trap. The trap is the bend in the toilet pipe that expels the waste.

Measure the set-out

Before you choose a toilet, it’s important to first establish the ‘set-out’ you need. This is the distance from the wall to the centre of the waste outlet for an S-trap, and the floor to the outlet for a P-trap

Water efficiency

The Australian Government has introduced a WELS scheme to help reduce the water consumption in homes. Based on a star rating system, it measures the amount of water per flush. A 3 STAR rating uses 6L for a full flush and 3L for a half flush. While a 4 STAR rating uses 4.5L for a full flush and 3L for a half flush.

Styles of toilet

Once you’ve settled on your toilet pan, your final step is to choose a toilet style. From concealed to wall faced, we’ll take you through the main types. Remember, it’s always best to check with your plumber about the types of toilets that will suit your bathroom. Mondella spec sheets can be downloaded and reviewed with your plumber to assess which will fit your plumbing set up.

Top Tips For Picking A Kitchen Faucet

Things That Make A Great Kitchen Faucet

It’s one of the most important components of any kitchen. Apart from improving the quality of your kitchen, a great faucet will also make your

Kitchen Function Well and Look Great

Purchasing a new kitchen faucet is one of the most interesting upgrades you can make. Whether you just want to personalize your kitchen or you just want to replace a damaged one, there is something out there for everyone. However, with so many brands and models on the market, choosing the best kitchen faucet can be overwhelming and sometimes confusing. So, what makes a kitchen faucet great? Here are some tips to consider.

Has a Brand

When it comes to choosing a faucet for your kitchen, it’s always advisable to choose a product with a strong brand name. Why should you even consider a non-branded product?

Some people assume that they will save money by avoiding the top brands. However, that is not always the situation. In fact, you might end up spending more money than you had initially saved.

Most of the non-branded faucets tend to have a short life. They start showing signs of wear and tear within a few months.

Low-quality faucets leak, drip, break and waste your water, which will eventually lead to higher utility bills. Therefore, you should not that buying a branded product doesn’t mean you are paying for the name.

Aligns with Your Kitchen’s Décor

In the modern kitchen, a faucet plays a vital role towards its looks and appeal. As much as reliability and functionality are the main priorities, looks are equally important. After all, all the major brands are producing reliable and functional faucets. What sets apart a great kitchen faucet brand from a common one is the issue of design. Respectable brands have realized that the modern consumer is paying more attention to design when choosing a kitchen faucet. Therefore, if you are choosing one for your kitchen, then you should also consider how it will align with the rest of the components.

Easy to Install and Operate

Installing a kitchen faucet should not consume more than 10 minutes for someone with basic DIY skills. Once you dismantle the old one, you just get the hoses through the holes drilled in the sink, put the faucet in its position and then fasten it from beneath using the attached screw nuts.

Having completed that phase, you should then proceed to attach the ends of the hose to the cold or warm water supplies. Its handle will adjust temperatures automatically while allowing the stream to flow precisely and steadily. You can even direct the stream in various areas on the kitchen sink.

Should Be Leak-free for Lifetime

Changing gaskets and washers after every few months belongs to the past. Also, the valves used in modern kitchen faucets have significantly evolved.

Most faucets now contain hard ceramics as valves, which are sometimes covered with diamond. With the use of these valves, it’s almost impossible for them to wear out as fast as they used to.

Also, they don’t leak their entire lifetime. Therefore, if you find yourself constantly changing gaskets and washers, it’s time to invest in a quality kitchen faucet, and you will not come across such issues anymore.

Apart from saving you money and time, the best kitchen faucet will also ensure a stream and precise water flow.

Deep Clearance

If you have a low kitchen faucet, you may not be able to wash large pots under it. You will be forced to change its position in the sink severally, to ensure it’s evenly washed. While that may not be a big issue, why should you struggle while there are better options on the market? When you are choosing a kitchen faucet, height clearance is one of the biggest considerations to make. To obtain the best value for your money, you can use the largest accessory that you have in your kitchen, which needs to be washed in the sink. You should then use its measurements to determine the height of the faucet’s arch.

Easy to Clean

Just like other kitchen appliances, you need to clean your kitchen faucet regularly. Cleaning prevents the accumulation of dirt, oils and other sediments from the utensils.

However, the cleaning process should not consume an entire hour. A few wipes with a cloth or sponge should be enough to clean it.

Also, the best kitchen faucet doesn’t develop stains that require special cleaners. In addition, fingerprints should not stick.

New Faucet, New Sink, or New Kitchen?

The first thing you’ll want to figure out is the mount-type you need (or want): sink deck, countertop, or wall. This depends on whether or not the sink is going to be new as well – a new sink gives you more freedom to choose where the faucet goes (especially if it’s part of a wider remodel or new build).

For a New Sink

  • If the faucet is for a new sink (and won’t be mounted on the wall), hold off on the sink until you find the faucet you want. Why? With most sinks, you can specify the number and location of holes on the sink deck – leaving you free to pick nearly any (deck-mounted) faucet you see. Purchase the sink too soon, and you’re stuck with the configuration originally selected.
  • Look out! Some sink materials allow for extra holes to be drilled at home, and may even come with scored knockouts to make the process easy. But due to the risk of cracking and damage – particularly with fireclay, cast iron and natural stone sinks – creating your own holes should be avoided if possible.
  • Likewise, faucets being installed in a new countertop should also be decided upon before finalizing the counter installation to make sure holes are drilled where they’re needed (some countertops can be difficult to modify on your own).

How to Measure the Faucet Hole Size?

The best way to measure the inside diameter of the faucet hole is to use a Slide Caliper. The measuring accuracy for this type of tool ranges from +/- 0.001″ to +/- 0.0015″ (+/- 0.02 mm to +/- 0.04 mm). Thus, using this tool to measure faucet holes would yield in accurate results. 

  1. Place the inside jaw of the caliper against the inside of the faucet hole.
  2. Slide the scale outward until it reaches the maximum distance.
  3. Slide the caliper out and the reading indicated would be the size of the faucet hole in diameter.

Repair or Replace Faucet?

Many times, the decision to replace faucets is an aesthetic one. When remodeling a bathroom or kitchen, it’s important to match the sink, shower, and tub sets to the rest of the design.

In addition to taste and style concerns, there are also plenty of practical reasons to replace your faucet as well.

  • Cracked, discolored, chipped, or otherwise damaged
  • Worn out or corroded parts, making repairs difficult or impossible
  • Replacing things like washers, aerators, nuts and bolts doesn’t fix the problem
  • Faucet repairs are over 30% of the cost for full replacement
  • Replacing a sink, tub, or shower
  • Ugly and outdated (aesthetic reasons)

If you are replacing a sink, tub, or shower, it’s a good idea to replace the fixture as well. Replacing a faucet, however, does not necessitate a fixture replacement. You can add new faucets without having to replace any other plumbing parts.

Holes in a Sink

A three-hole sink is a common bathroom faucet hole size and is also a common type of kitchen sink. Faucets used on a three-hole sink usually have a plate or a base, called an escutcheon, which covers the holes. An escutcheon can also be used to cover the extra holes when installing a single-hole faucet in a three-hole sink.

A four-hole sink is the most common type of kitchen sink. It is similar to a three-hole design with an extra hole set a little further away for a sprayer or soap dish. A two-hole sink is designed for a single-hole faucet and a sprayer or soap dish with no escutcheon. A one-hole sink is used with a single-hole faucet, usually without an escutcheon.

Managing Water Leak And Broken Pipes

PIPES: CHOOSING THE RIGHT REHABILITATION METHOD

The first thing to determine when considering rehabilitation of pipes or manholes is what is the purpose of the rehabilitation. Does the system need structural repair? Does Infiltration/Inflow (I/I) need to be eliminated, does system capacity need improvement? Or a combination? The answers can direct a manager to the most cost effective, efficient use of limited resources.

Aging infrastructures and sanitary sewer overflows (SSO), combined with limited funding and increasingly stringent compliance requirements, make keeping their systems in good working order a daunting task for collection system managers. To accommodate the lack of funds needed to replace large portions of a municipal sanitary sewer system, many managers are investigating techniques for extending the life of their collection system assets through pipe and manhole rehabilitation.

Chemical Grouting

One option for non-structural repair is chemical grouting. Ideally suited to stopping leakage and reducing soil loss, grouting consists of injecting a self-setting grout into structurally sound leaking joints or small wall cracks. The grout travels outside of the joint or manhole wall into surrounding soils and bonds with those soils to create a seal collar of material around the leaking joint or wall defect.

Sliplining

When existing capacity is sufficient, sliplining is a relatively cost-effective rehabilitation method in which a pipe is inserted into an existing line by either pulling or pushing continuous or short-length pipes, frequently HDPE pipe. With traditional sliplining, a lead-in trench is excavated for installation and pipes are butt-welded on the surface of the ground before being winched or jacked into the existing pipe.

Cured-in-Place Pipe (CIPP)

Using a polyester flexible sock or sleeve impregnated with resin that is inverted or winched into the pipe, CIPP liners are considered a trenchless repair. The sock is inverted using winch inversion, water inversion or air (steam) inversion. Inversion allows the liner to conform to the existing pipe contours providing for minor irregularities or slight changes of pipe direction. Increasing the thickness of the polyester sock increases the thickness of the pipe.

Burst/Broken Pipes

Age

In the Charlotte and Greenville areas, our gorgeous old homes and buildings draw tourists from miles away. If you live in an older home, though, make sure that your plumbing isn’t as old as the rest of the house. The same principle applies if you own a historic building. Pipes can wear down with age, and they eventually burst.

Clogs

Our drains collect all sorts of things other than water. Hair, toilet paper, and other items go down the drain all the time. Sometimes, though, those items get stuck. We’ve all dealt with the occasional hair clog, but the really bad clogs can cause pipes to burst. Water builds up behind these clogs, and when the pressure gets too strong, the pipes crack. Stay mindful of drain clogs,and be careful about the items that go down your drains.

Freezing

More often than not, when a pipe bursts, it happens in the winter. Compared to many other places, North Carolina has fairly mild winters. However, that doesn’t mean we don’t experience temperatures below freezing. And when that happens, our pipes can freeze, too. When a pipe freezes, so does the water inside it. Waterexpands as it freezes, putting pressure on the pipe and causing it to crack. During colder times, make sure that warm air can get to your pipes. Open the cupboards under the sinks, and insulate the pipes that aren’t near heat sources.

The Problem with Pipe Water

When groundwater floods your basement or when your sewer line backs up, you’ll notice the problem very quickly. Both of these problems are terrible, but once the water is gone, it’s gone. However, if you have water that’s slowly leaking from a broken pipe, there’s no telling how long you’ve had that problem. The water from leaking pipes can find hidden pockets, slipping through cracks and causing damage behind the scenes. Just because you’ve dried the surface doesn’t mean that you’ve gotten rid of all of the water.

Floor Damage

Floors can take on a lot of the damage from broken pipes. Hardwood floors get bent into odd shapes so that the floorboards don’t fit into their spaces anymore. Laminate floors don’t escape damage, either. Constantly dripping water can wear the lamination off the floors. Carpets, of course, absorb water and develop stains

FACTORS TO CONSIDER WHEN CHOOSING A PLUMBING PIPE

Making decisions about plumbing for your property can be overwhelming, especially if you don’t have any previous plumbing experience. Your plumbing material choice is important, as it provides you with one of our most precious resources: water. By gaining a better understanding of the factors you should take into account when choosing your plumbing pipe material, you will be able to make a more educated decision.

WATER TYPE

Depending on where you live, the water going through your pipes may be corrosive. Corrosive water refers to water that dissolves materials it comes into contact with. Corrosive water is problematic in your home because the last thing you want is your pipes degrading only a few years after they’ve been installed. Although the water itself isn’t harmful, when it corrodes copper and metal pipes, it also dissolves copper and lead into the water supply, which does pose health concerns. A water test conducted by a professional determines the level of acidity in your water source.

PLUMBING USE

The amount of water pressure you require is another important determinant in finding the correct plumbing pipe for your property. Chances are, if you are looking for a plumbing solution in a commercial space, you are seeking high water pressure. To maintain high water pressure, a pipe will need to be wide and durable enough to sustain significant force. Plastic pipes are usually the best option in this case, as they are specifically designed for this use.

SOIL CHARACTERISTICS

The composition of the soil surrounding your pipes has significant effects on their durability. Soil with excess rocks, moisture, and abrasive materials will eventually degrade your pipes. It’s also important to look at the chemical composition of the soil. Sometimes, soil with excess minerals can create a reaction when it comes into contact with certain pipe materials.

EXPOSURE TO SUNLIGHT

Sun has similar effects on pipes as it does to our skin. Ultraviolet (UV) rays deteriorate the surface quality of plastic pipes over time, making them more vulnerable to issues and decreasing their lifespan. Excess exposure to sunlight can also cause problems related to changes in temperature. PVC pipes aren’t used to carry hot water, so it’s not a good idea to have them installed in areas that naturally reach high temperatures. To combat this, many plumbers will use insulating materials to prevent temperature fluctuations affecting pipe quality.

The Most Common Plumbing Problems and When to Call a Professional

Almost every homeowner or renter has a few essential tools on hand to cope with minor plumbing emergencies. Many times, a clogged toilet or slow drain may only need a little elbow grease and a plunger to work as intended. If you’re handy around the house, you can generally tackle a small repair such as changing out a worn washer or replacing a drain cover. However, bigger plumbing repair jobs need professional attention. Trying to repair some common issues such as slow drains or leaking toilets could lead to bigger problems later.

Plumbing Maintenance

One way to prevent costly repairs to your home is a regular maintenance schedule. Because many issues with your pipes sneak up on you, a thorough inspection is the key to catching small problems before they grow. Hidden leaks in sink drains or below water heaters are more than just a nuisance; over time, they can cause structural damage. Water that seeps into sheetrock or plaster contributes to mold growth. Porous tile or wood flooring can discolor or warp when wet.

Routine DIY Maintenance Tasks

Many routine maintenance tasks are simple do-it-yourself jobs. An inspection is the foundation of any maintenance schedule. You may use your sinks and tubs daily, but you might not notice minor concerns unless you set aside time for an inspection. Go through your home and take a look at your plumbing. Examine all exposed pipes, including under sinks and behind toilet tanks, for any signs of moisture. On a humid day, some condensation on a cold metal pipe is normal, so note any dampness and check the pipes again when the home is cooler. Check for signs of corrosion on brass or copper fittings; corrosion occurs more rapidly on damp metal, so corroded connections could reveal a slow leak.

Professional Inspections

Inspections from a certified Bradenton, FL, plumber give you a more in-depth look at your home’s pipes and drains. Your inspector will check the water heater, garbage disposal and every area of your home’s plumbing system. More thorough assessments might include remote video inspection of pipes, lead testing and filter system inspection.

Common Plumbing Repair Jobs

Even the most thorough plumbing maintenance inspection won’t prevent the occasional clog or leak, especially in older homes. The high water table in the Sarasota and Bradenton, FL area also contributes to septic system problems that can affect toilets and drains. Many of these common issues have equally common solutions

Main Types of Plumbing Pipes Used in Homes

Whether hiring a plumber or taking on a do-it-yourself plumbing project, the experience can be confusing because of the choice of several types of plumbing pipes. Eventually, pipes’ uses tend to blend together. Which type of pipe should be used for water supply, drainage, sewer, and even for the exterior? The answer is not as clear as it may have been in the past when the main pipes of choice were galvanized steel or cast-iron.

PEX Pipe

PEX, or cross-linked polyethylene, pipe is one of the newest and most popular pipes to hit the plumbing market. PEX is used only to supply water. PEX is a pipe that is rigid enough to withstand the pressures of water supply but flexible enough to weave throughout walls, ceilings, basements, and crawlspaces. PEX has truly delivered water-supply plumbing into the hands of do-it-yourselfers and professional plumbers.

PVC Pipe

PVC, or polyvinyl chloride, pipe is a drain or vent line type of plumbing pipe. PVC initially gained popularity because it was lighter and easier to work with than traditional galvanized steel pipe. PVC pipe is moderately easy to install and requires little more than a hacksaw and a miter box to cut. PVC glues together with solvents

Rigid Copper Pipe

Rigid copper is often used for water supply lines within the home. Rigid copper is easily cut with a hacksaw or with a special copper tube cutter. The connection is a different matter, as it requires a practiced hand to solder copper pipe together. Rigid copper pipe is great for water supply because it does not come with any health risks.

ABS Pipe

ABS (acrylonitrile butadiene styrene) pipe is mainly used as a vent and drain line. ABS pipe looks very much like PVC pipe, except that it is black and slightly softer.